There’s nothing quite as comforting as a homemade pie, but achieving that perfectly crunchy, golden crumble topping for your Cherry Crumble Pie can sometimes feel like a baker’s elusive dream. I intimately understand the frustration of a soggy or too-fine crumble that just doesn’t deliver the texture you crave. This recipe, however, shares a simple, game-changing method ensuring a spectacularly crunchy topping every single time, making your pie truly irresistible.
Why This Cherry Crumble Pie Recipe Gets Rave Reviews (And Your Own “Golden Crunchy” Moment!)
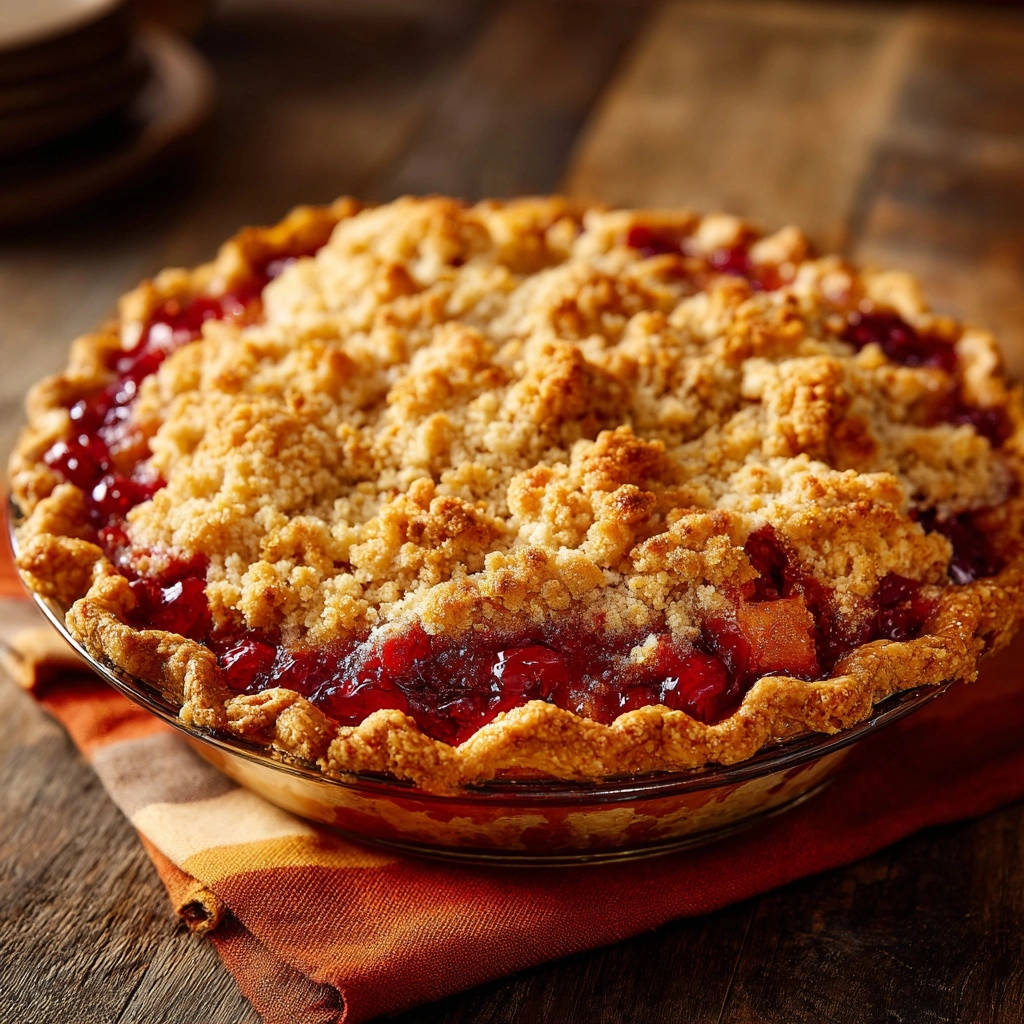
This isn’t just another pie recipe; it’s your definitive guide to a Cherry Crumble Pie that consistently earns compliments. The secret lies in a meticulously developed crumble topping technique designed to prevent sogginess and maximize crispness.
Every bite delivers a delightful contrast: juicy, sweet-tart cherries nestled under an explosion of golden, crunchy goodness. Prepare for your baking efforts to be met with resounding approval, creating your very own “golden crunchy” moment that elevates a simple dessert to extraordinary.
Your Essential Toolkit: Preparing for Pie Perfection
Having the right tools ready makes the baking process smoother and more enjoyable. Gather these essentials before you begin.
9-inch Pie Plate: The stage for your masterpiece, ensuring even baking and a beautiful presentation.
Large Mixing Bowls: You’ll need separate bowls for preparing the pie crust, the luscious cherry filling, and the star crumble topping.
Pastry Blender or Two Knives: Crucial for cutting cold butter into flour, which is key for flakiness and crumble texture.
Rolling Pin: Essential for achieving a uniformly thin and perfectly shaped pie crust.
Wire Rack: Critical for allowing the pie to cool evenly and for the filling to set properly after baking.
Baking Sheet: Placed under the pie in the oven, it catches any potential drips, making cleanup effortless.
The Building Blocks of Flavor: What You’ll Need
For the Flaky Foundation: Your Pie Crust Essentials
The crust provides a tender base that perfectly complements the rich filling and crunchy topping.
All-Purpose Flour: Provides the fundamental structure for a tender, yet sturdy pie crust.
Salt: A small amount of salt enhances the overall flavor of the dough, balancing the sweetness of the pie.
Cold Unsalted Butter: This is critical for achieving a flaky texture. Cut into small pieces, the cold butter creates steam pockets during baking, which separate the layers of dough.
Ice Water: Using ice water is crucial for hydrating the dough without overdeveloping gluten. This ensures your crust remains tender, not tough, and easier to handle.
Sweet & Tart Harmony: Crafting the Cherry Filling
The heart of your Cherry Crumble Pie, this filling balances sweetness with a delightful tart zing.

Fresh or Frozen Pitted Cherries: The star fruit of this pie, offering a perfect balance of tart and sweet flavors. Remember to thaw and drain frozen cherries thoroughly.
Granulated Sugar: Sweetens the cherries and works to balance their natural tartness, creating a harmonious flavor.
Cornstarch: Acts as a reliable thickening agent. It ensures a perfectly set filling that isn’t watery, holding its shape beautifully when sliced.
Lemon Juice: A splash of lemon juice brightens the cherry flavor and adds a touch of necessary acidity, preventing the filling from tasting flat.
Almond Extract (Optional): This extract beautifully complements the cherry flavor, adding a subtle, nutty depth that enhances the overall fruitiness.
The Star Attraction: Ingredients for the Golden Crumble Topping
This is where the magic happens, creating that signature golden, crunchy texture.
All-Purpose Flour: Forms the essential base and structure of the crumble’s texture, providing substance to hold the other ingredients.
Packed Light Brown Sugar: Contributes a rich, caramel-like sweetness and a slight chewiness, adding depth of flavor to the topping.
Granulated Sugar: Provides additional sweetness and helps achieve that irresistible golden crispness during baking.
Ground Cinnamon: Adds warmth and an aromatic spice that perfectly pairs with the sweet-tart cherries, creating a comforting aroma.
Cold Unsalted Butter: This is the crucial element for the crumble’s distinct, crunchy texture. The cold fat melts slowly, preventing a dense paste and ensuring crisp, separated crumbs.
Your Path to Cherry Crumble Pie Perfection: A Detailed Guide
Follow these steps carefully to achieve a Cherry Crumble Pie that’s truly exceptional, complete with that coveted golden crunch.
- Crafting the Flaky Pie Crust:
In a large bowl, whisk together the 1 ¼ cups of all-purpose flour and ½ teaspoon of salt. Next, cut in the very cold, small pieces of butter using a pastry blender or your fingertips. Work quickly until the mixture resembles coarse crumbs, with some pea-sized butter pieces still visible.
Gradually add ¼ to ½ cup of ice water, one tablespoon at a time, mixing gently until the dough just comes together. Be careful not to overmix, as this can overdevelop the gluten and result in a tough crust.
Form the dough into a disc, wrap it tightly in plastic wrap, and chill it in the refrigerator for at least 30 minutes. This chilling time allows the gluten to relax, makes the dough easier to roll, and prevents shrinkage during baking.
- Preheating Your Oven:
Before you dive into the next steps, preheat your oven to 375°F (190°C). A properly preheated oven is essential for even baking and helps ensure your pie crust becomes delightfully crisp.
- Rolling Out and Preparing the Crust:
On a lightly floured surface, roll out the chilled pie dough into a 12-inch circle. Carefully transfer the rolled dough into a 9-inch pie plate. Trim any excess dough from the edges, then crimp them decoratively as desired for a beautiful, finished look.
For an extra crisp bottom crust, especially important with juicy fruit fillings like cherries, you can blind bake it. Bake the crust for 10-15 minutes, then let it cool completely before adding the filling.
- Assembling the Vibrant Cherry Filling:
In a separate large bowl, combine the 6 cups of pitted cherries (if using frozen, ensure they are fully thawed and thoroughly drained), ¾ cup of granulated sugar, ¼ cup of cornstarch, and 1 tablespoon of lemon juice. If you’re using it, stir in ½ teaspoon of almond extract.
Gently toss all the ingredients until the cherries are evenly coated with the sugar and thickener. Pour this vibrant cherry mixture into your prepared pie crust, spreading it out evenly.
- The “Golden Crunchy Secret”: Preparing the Crumble Topping:
In a medium bowl, whisk together 1 cup of all-purpose flour, ½ cup packed light brown sugar, ¼ cup granulated sugar, and ½ teaspoon of ground cinnamon until they are uniformly combined. This step ensures an even distribution of all dry ingredients.
Now, for the game-changing secret: Add the very cold, cubed butter to the dry ingredients. Use your fingertips, a pastry blender, or two knives to quickly cut the butter into the flour mixture. Work swiftly until the mixture resembles coarse crumbs with some pea-sized pieces of butter still visible. The key here is to not overmix; this technique prevents a pasty topping and ensures those distinct, golden, crunchy bits after baking.
For added textural interest and more satisfying bites, gently squeeze a few crumbs together with your fingers to create larger clusters. These will bake up into wonderfully irregular, crunchy nuggets.
- Topping and Baking Your Pie:
Evenly sprinkle the prepared crumble topping over the cherry filling, ensuring good coverage across the entire surface. Place the pie onto a baking sheet; this will catch any potential drips from the bubbling filling and make cleanup much easier.
Bake the pie for 50-60 minutes, or until you see the filling actively bubbling up through the crumble and the topping is deeply golden brown and crunchy. If the crumble starts to brown too quickly, you can loosely tent the pie with aluminum foil to prevent over-browning.
- The Critical Cooling Phase:
Once baked to perfection, carefully transfer your Cherry Crumble Pie to a wire rack. It is absolutely crucial to let it cool completely for at least 2-3 hours before slicing and serving. This extended cooling period allows the cornstarch in the filling to fully set, guaranteeing beautiful, clean slices and the intended luscious consistency.
Unlocking the Golden Crunch: Advanced Tips for a Superior Crumble
Achieving that iconic, shatteringly crisp crumble is simpler than you think when you understand a few key principles. These tips are central to our “game-changing method.”
Keep That Butter ICE COLD: This is arguably the most critical step for a truly golden and crunchy crumble topping. Icy cold butter creates steam pockets as it melts in the oven, leading to a wonderfully flaky and crispy texture rather than a dense, greasy one. Don’t compromise on coldness!
Don’t Overwork the Crumble: Mix just enough until the butter is incorporated and the mixture resembles coarse crumbs. Overmixing develops gluten and warms the butter, which can lead to a softer, less distinct crumble that loses its crispness.
Vary Crumble Size for Texture: While aiming for coarse crumbs, don’t be afraid to gently squeeze some of the mixture together to create larger clusters. These bigger pieces will bake up into delightfully irregular, crunchy nuggets, adding wonderful textural contrast to your topping.
Monitor Browning Closely: Crumble toppings can transition from perfectly golden to burnt quite quickly due to the sugar content. Keep a close eye on your pie during the last 15-20 minutes of baking, and if it’s browning too fast, loosely tent it with foil.
Expert Tips for a Flawless Pie Every Time
Beyond the crumble, a few strategic moves will ensure your entire Cherry Crumble Pie is a resounding success from crust to filling.
Chill Your Crust Dough Adequately: Never skip the chilling step for the pie crust. It allows the gluten to relax, making the dough much easier to roll out without tearing or shrinking. Crucially, it also keeps the butter firm, which is essential for that ultimate flaky texture.
Blind Baking for a Crisp Bottom: If you desire an extra-crisp bottom crust that holds up to the juicy cherry filling, blind bake it. This pre-baking creates a protective barrier against moisture, preventing a soggy bottom, especially with fruit-heavy pies.
Drain Frozen Cherries Thoroughly: If you opt for frozen cherries, ensure they are completely thawed and very well-drained. Excess moisture is the primary culprit behind a watery filling, even when using cornstarch. Pat them dry with paper towels if needed to remove every last bit of liquid.
Patience in Cooling is a Virtue: It’s tempting to cut into a warm pie, but resist the urge! The 2-3 hour cooling time is absolutely essential for the filling to properly set. This ensures clean, beautiful slices and the intended luscious texture, so plan accordingly.
Common Crumble Pie Questions & Savvy Solutions
Encountering an issue? Here are some common challenges and how to overcome them for a perfect Cherry Crumble Pie.
Problem: My Pie Filling is Too Runny!
This often happens if the cherries weren’t drained enough (if frozen) or if the pie wasn’t cooled completely. Ensure adequate cooling time; the filling continues to thicken as it cools. You can also slightly increase the cornstarch next time (by 1-2 teaspoons) for a thicker set.
Problem: My Crumble Topping Isn’t Crunchy Enough.
The key is often icy cold butter and not overmixing the ingredients. Make sure your butter is truly cold when you incorporate it, and avoid forming a uniform dough. Large, distinct crumbs and sufficient baking time (until deeply golden brown) are crucial for that desired crunch. For more crunchy topping wisdom, check out our recipe for Easy Peach Crumble, which uses similar principles.
Problem: My Pie Crust is Tough or Shrinks.
A tough crust is usually a clear sign of overmixing the dough, which develops too much gluten. Shrinkage can occur if the dough wasn’t chilled long enough before rolling and baking. Always handle the dough minimally and ensure proper chilling time to maintain its tender flakiness.
Enjoying Your Masterpiece: Serving & Storage Tips
Your beautiful Cherry Crumble Pie deserves to be enjoyed to its fullest. Here’s how to serve it and keep it fresh.
Perfect Serving Suggestions
This Cherry Crumble Pie is absolutely delightful on its own, its flavors shining through. However, it truly ascends to dessert heaven with a generous scoop of vanilla bean ice cream, a dollop of freshly whipped cream, or a drizzle of tangy crème fraîche. The cool, creamy toppings provide a wonderful contrast to the warm, fruity pie.
Storing Leftover Pie
Store any leftover pie loosely covered with foil or plastic wrap at room temperature for up to 2 days. For longer storage and to maintain freshness, you can refrigerate it for up to 3-4 days. While still delicious cold, a quick warm-up in a low oven can help revive some of that wonderful crumble crunch.
Can I Make This Pie Ahead?
Yes, many components can be prepared in advance! You can prepare the pie dough and the crumble topping a day ahead and store them separately in the refrigerator. The assembled, unbaked pie can also be prepared a few hours ahead and kept chilled until you are ready to bake it. For the absolute best texture and flavor, it’s ideal to bake the pie fresh on the day you plan to serve it.
Your Cherry Crumble Pie Queries Answered
We’ve gathered answers to your most common questions about making and enjoying this delicious dessert.
Can I use other fruits for the filling?
Absolutely! This versatile crumble topping pairs beautifully with many fruits. You can easily substitute peaches, apples, mixed berries, or a combination of your favorite fruits. Just be sure to adjust the sugar and cornstarch quantities slightly based on the sweetness and juiciness of your chosen fruit. For more inspiration, explore our guide to fruit pie variations.
What if I don’t have a pastry blender for the crumble?
No problem at all! You can easily use two knives to cut the cold butter into the dry ingredients, crisscrossing them until you achieve coarse, pea-sized crumbs. Your fingertips can also work effectively, but be sure to work very quickly to avoid melting the butter with the warmth of your hands.
Is it possible to make this gluten-free?
Yes, you can absolutely adapt this recipe to be gluten-free! Substitute the all-purpose flour in both the pie crust and the crumble topping with a high-quality 1:1 gluten-free baking flour blend that contains xanthan gum. While the texture might be slightly different, it will still yield a delicious pie.
How do I know when the pie is fully cooked?
Look for a few key indicators to confirm your pie is perfectly baked: the filling should be actively bubbling up through the crumble (this indicates it has thickened correctly), and the crumble topping itself should be a deep, rich golden brown. The edges of the pie crust should also appear golden and firm. If you’re still unsure, an instant-read thermometer inserted into the filling (avoiding the bottom crust) should read between 200-210°F (93-99°C).
Bake, Share, & Savor: Your Ultimate Cherry Crumble Pie Awaits!
You now possess the secrets to mastering a truly perfect, golden crunchy Cherry Crumble Pie! This recipe promises not just a dessert, but a delightful experience-from the sweet-tart burst of the cherries to that utterly irresistible, crumbly topping. It’s a testament to how simple techniques, applied correctly, can deliver extraordinary, memorable results.
Now that you’re armed with the knowledge and the game-changing secret to an impeccable crumble, go forth and create! Share your delicious creation with loved ones, and savor every single bite of this homemade goodness. Don’t forget to explore our other comforting bakes, like our Classic Fruit Crumble Bars, for more delicious inspiration!

Cherry Crumble Pie
Ingredients
- For the Pie Crust:
- 1 1/4 cups all-purpose flour
- 1/2 teaspoon salt
- 1/2 cup (1 stick) unsalted cold butter, cut into small pieces
- 1/4 to 1/2 cup ice water
- For the Cherry Filling:
- 6 cups fresh or frozen pitted cherries (thawed if frozen)
- 3/4 cup granulated sugar
- 1/4 cup cornstarch
- 1 tablespoon lemon juice
- 1/2 teaspoon almond extract (optional)
- For the Crumble Topping:
- 1 cup all-purpose flour
- 1/2 cup packed light brown sugar
- 1/4 cup granulated sugar
- 1/2 teaspoon ground cinnamon
- 1/2 cup (1 stick) unsalted cold butter, cut into small pieces
Instructions
- Prepare the Pie Crust: In a large bowl, whisk together 1 1/4 cups flour and 1/2 teaspoon salt. Cut in the 1/2 cup cold butter until pea-sized crumbs form. Gradually add ice water, 1 tablespoon at a time, mixing until the dough just comes together. Do not overmix. Form into a disc, wrap in plastic, and chill for at least 30 minutes.
- Preheat your oven to 375°F (190°C).
- On a lightly floured surface, roll out the chilled pie dough into a 12-inch circle. Carefully transfer it to a 9-inch pie plate. Trim and crimp the edges as desired. If you desire an extra crisp bottom crust, you can blind bake it for 10-15 minutes, then let cool.
- Prepare the Cherry Filling: In a large bowl, combine the pitted cherries, 3/4 cup granulated sugar, cornstarch, lemon juice, and almond extract (if using). Stir gently until the cherries are evenly coated. Pour the cherry filling into the prepared pie crust.
- Prepare the Crumble Topping (The Golden Crunchy Secret!): In a separate medium bowl, whisk together the 1 cup flour, brown sugar, 1/4 cup granulated sugar, and ground cinnamon. Now for the secret to that golden crunch: Add the very cold cubed butter. Using your fingertips, a pastry blender, or two knives, quickly cut the butter into the dry ingredients. Work swiftly until the mixture resembles coarse crumbs with some pea-sized pieces of butter still visible. The key here is not to overmix; this is what prevents a pasty topping and ensures those distinct, golden, crunchy bits after baking. You can even gently squeeze a few crumbs together with your fingers to create larger clusters for varied texture.
- Evenly sprinkle the prepared crumble topping over the cherry filling.
- Place the pie on a baking sheet to catch any drips. Bake for 50-60 minutes, or until the filling is bubbly and the crumble topping is deeply golden brown and crunchy. If the topping browns too quickly, you can loosely tent the pie with foil.
- Let the pie cool completely on a wire rack for at least 2-3 hours before slicing and serving. This allows the filling to set properly. Enjoy your perfect, golden crunchy crumble pie!