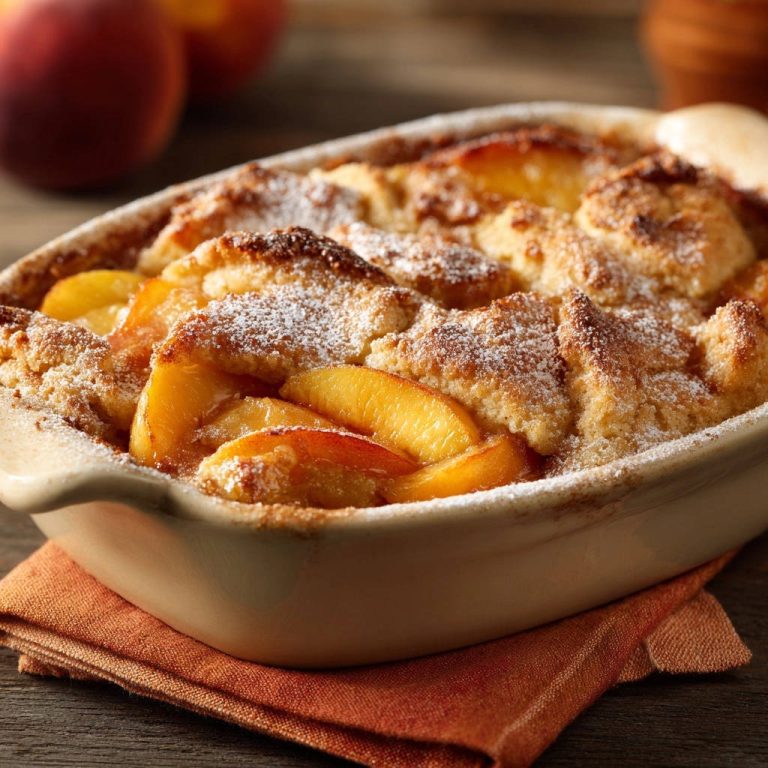
Many home bakers cherish the bright, zesty appeal of a homemade lemon bar, yet often face the challenge of achieving that perfectly set, fudgy filling. I’ve certainly experienced the frustration of a runny center, which can transform a delightful treat into a sticky disappointment. This recipe for Classic Lemon Bars is my tried-and-true solution, featuring a simple, ingenious trick that guarantees an irresistibly smooth, never-runny consistency every single time.
Just wait until you experience the perfect balance of tangy lemon and sweet, tender crust in these delightful citrus treats. You’re about to master a recipe that consistently delivers bakery-quality results, impressing everyone who takes a bite.
Beyond Basic: What Makes Our Classic Lemon Bars Irresistible?
Achieving the Elusive Fudgy Smooth Texture
Our recipe guarantees a perfectly set, indulgently fudgy, and never-runny lemon filling. The “secret” lies in a specific ingredient addition to the filling, which provides crucial structure without altering the bright lemon flavor.
This method ensures the filling maintains a delightful melt-in-your-mouth quality, far superior to dense or gelatinous alternatives. You’ll achieve a consistent, creamy texture that defines truly exceptional lemon squares.
A Foolproof Method for Perfectly Set Filling
This recipe stands out for its reliability, addressing common pitfalls like underbaked or excessively firm centers. We provide clear indicators for doneness, eliminating guesswork from the baking process.
You can confidently bake these lemon bars, knowing the outcome will be a beautifully set, delectable dessert. It’s designed to be approachable for all skill levels, delivering consistent success.

Why Fresh Lemon Zest & Juice Make All the Difference
The vibrancy and depth of flavor in these lemon bars come directly from using fresh lemons. Freshly squeezed juice offers a bright, natural tang that bottled versions simply cannot replicate.
Lemon zest, packed with aromatic oils, infuses the filling with an intense, fragrant citrus essence. This combination elevates the entire experience, making each bite burst with authentic lemon flavor.
Your Kitchen Arsenal for Lemon Bar Success
Baking Pan & Parchment Paper: The Unsung Heroes
An 8×8 inch baking pan is ideal for achieving the perfect thickness and proportion for these lemon bars. Its size is key for the correct crust-to-filling ratio.
Lining the pan with parchment paper, especially with an overhang, is a critical step. This simple technique allows you to effortlessly lift the entire slab of cooled bars out, ensuring clean, intact slices.
Precision Tools: Pastry Blender & Whisk
A pastry blender is invaluable for cutting cold butter into the flour mixture, creating a tender, flaky shortbread crust. Alternatively, two knives or your fingertips work effectively.
A good whisk is essential for thoroughly combining the lemon filling ingredients. It ensures a smooth, lump-free mixture, which is vital for that signature fudgy texture.
The Building Blocks of Flavor: Inside Your Classic Lemon Bars
For the Buttery Shortbread Crust
All-Purpose Flour: Provides the fundamental structure and tender crumb for the shortbread base. Its gluten content forms the perfect foundation.
Powdered Sugar: Contributes to the crust’s delicate sweetness and melt-in-your-mouth texture. It dissolves more readily than granulated sugar, resulting in a finer crumb.
Cold Unsalted Butter: Essential for a rich, flaky crust. The cold butter creates pockets of steam during baking, separating the layers and yielding a truly tender result.
Salt: Balances the sweetness and enhances the overall flavor of the crust. It elevates the buttery notes beautifully.
Crafting the Iconic Lemon Filling
Granulated Sugar: Provides the necessary sweetness to balance the intense tartness of the lemon. It also plays a role in the filling’s texture.
All-Purpose Flour: This is the “fudgy smooth secret” for the filling. It acts as a gentle thickener, helping the filling set beautifully without becoming rubbery or overly dense.
Large Eggs: Contribute richness, structure, and a vibrant yellow hue to the filling. They are crucial for binding the ingredients together.
Fresh Lemon Juice: Delivers the quintessential bright, tangy flavor that defines lemon bars. Freshness is paramount for the best taste.
Lemon Zest: Packed with aromatic oils, zest amplifies the lemon flavor and fragrance in the filling. It provides a deeper, more complex citrus note than juice alone.
The Finishing Touch: Powdered Sugar
Powdered Sugar: Used for dusting just before serving, it adds a beautiful aesthetic appeal and a final delicate layer of sweetness. It creates a classic, elegant finish.
Your Path to Fudgy Smooth Classic Lemon Bars: A Detailed Guide
- Prepare the Crust:
Preheat your oven to 350°F (175°C) and meticulously line an 8×8 inch baking pan with parchment paper, ensuring an overhang on two sides. This overhang is crucial for easily lifting the bars out later.
In a medium bowl, combine 1 cup all-purpose flour, 1/4 cup powdered sugar, and 1/4 teaspoon salt. Add the 1/2 cup cold unsalted butter, cut into small cubes, and cut it into the dry ingredients using a pastry blender, two knives, or your fingertips.
Continue working the butter until the mixture resembles coarse crumbs with some pea-sized pieces of butter remaining. This technique is vital for a tender, flaky shortbread crust.
Press this mixture firmly and evenly into the bottom of the prepared pan, ensuring no gaps. Bake for 18-20 minutes, or until lightly golden brown, then set aside to cool slightly while you prepare the filling.
- Make the Lemon Filling (The Fudgy Smooth Secret!):
In a large bowl, whisk together the 1 1/2 cups granulated sugar and 1/4 cup all-purpose flour until well combined. This initial mixing of sugar and flour is the critical step that creates the incredibly stable, fudgy smooth texture without making the filling dense.
Add the 4 large eggs, 1/2 cup fresh lemon juice, and 1 tablespoon lemon zest to the sugar-flour mixture. Whisk everything together thoroughly until the mixture is completely smooth and no lumps of flour remain.
Remember not to overwhisk; mix just until all ingredients are fully incorporated and the mixture is uniform. Over-whisking can introduce too much air, which can affect the final texture.
- Bake to Perfection:
Carefully pour the smooth lemon filling evenly over the warm, pre-baked crust in the pan. The warmth of the crust helps the filling adhere beautifully.
Return the pan to the oven and bake for an additional 20-25 minutes. The key indicator for doneness is when the edges are lightly golden and set, but the center still exhibits a slight, gentle wobble when the pan is lightly shaken.
This gentle wobble ensures a fudgy, not rubbery, texture, as the bars will continue to firm up considerably as they cool. Overbaking will result in a dry or rubbery texture, so watch carefully and trust the wobble test!
- Cooling is Crucial:
Immediately remove the pan of lemon bars from the oven and allow them to cool completely at room temperature on a wire rack. This initial cooling helps prevent condensation from forming on the bars.
For the absolute best fudgy smooth texture and clean, precise cuts, refrigerate the bars for a minimum of 2 hours, or ideally, overnight. This extended chilling time is essential for the filling to fully set and achieve its perfect consistency and stability.
- Serve:
Once thoroughly chilled, use the parchment paper overhang to gently lift the entire slab of lemon bars out of the pan and transfer it to a cutting board.
Slice into your desired squares or rectangles using a sharp, clean knife. For extra clean cuts, wipe your knife with a warm, damp cloth between each slice.
Just before serving, generously dust the bars with powdered sugar for a beautiful finish and an extra touch of delicate sweetness. This final flourish makes them look irresistible.
Chef’s Secrets for Unforgettable Classic Lemon Bars
The Magic of Cold Butter in Your Crust
Using very cold butter, cut into small cubes, is paramount for a tender, flaky shortbread crust. The cold butter prevents over-incorporation, ensuring distinct pockets of butter that create flakiness as they melt and release steam during baking.
Don’t Skip the Flour in the Filling (Here’s Why!)
The small amount of all-purpose flour whisked with the sugar before adding wet ingredients is this recipe’s “secret weapon.” It provides crucial structure and stability, ensuring the filling sets beautifully without becoming dense or gummy, giving you that signature fudgy smooth texture that makes these treats irresistible.
Reading the Wobble: Perfect Bake Cues
Trust the gentle wobble! When the edges of your lemon bars are set and lightly golden, and the center still has a slight jiggle, they are perfectly baked. They will firm up considerably as they cool, so pulling them out at this point prevents overbaking and preserves the moist, tender filling.
The Power of Patience: Chilling for Flawless Slices
Resist the urge to cut warm bars! Refrigerating the bars for at least two hours, or even overnight, is non-negotiable for clean, sharp slices and that ultimate fudgy smooth consistency. Chilling allows the filling to fully set and develop its ideal texture.
Fresh vs. Bottled: Lemon Juice Matters
Always use freshly squeezed lemon juice and zest. The vibrant, complex flavor profile from fresh lemons is unmatched by bottled juice and is essential for truly outstanding lemon bars. The zest provides aromatic oils that enhance the overall citrus experience.
Troubleshooting & FAQs: Mastering Your Lemon Bar Journey
Why is My Lemon Filling Runny?
A runny lemon filling usually indicates underbaking. The bars likely didn’t reach that crucial “gentle wobble” stage in the oven, meaning the flour and eggs didn’t fully set the mixture.
Insufficient chilling time is another common culprit. The filling needs at least 2 hours, or ideally overnight, in the refrigerator to completely firm up and achieve its fudgy texture.
Help! My Crust is Too Hard or Crumbly!
A hard crust often results from overworking the dough, which develops too much gluten. Ensure you cut the butter in just until coarse crumbs form, avoiding excessive mixing.
Not using cold enough butter can also contribute to a tough crust. If your crust is too crumbly, it might indicate too much flour or insufficient moisture; measure accurately and ensure proper butter incorporation.
Can I Make These Classic Lemon Bars Gluten-Free?
Yes, you can adapt this recipe for gluten-free diets. Simply substitute the all-purpose flour in both the crust and the filling with a 1:1 gluten-free baking flour blend that contains xanthan gum.
Ensure your chosen gluten-free blend is suitable for baking and that all other ingredients are certified gluten-free. The bake time may vary slightly, so monitor closely.
How to Store Leftover Classic Lemon Bars?
To maintain peak freshness and texture, store leftover Classic Lemon Bars in an airtight container in the refrigerator. This prevents them from drying out and keeps the filling firm.
They will keep beautifully in the fridge for up to 5-7 days. Always bring them to room temperature for about 10-15 minutes before serving for optimal flavor experience.
Can I Freeze Classic Lemon Bars?
Absolutely! Classic Lemon Bars freeze exceptionally well. Arrange the cut bars in a single layer on a baking sheet and freeze until solid, then transfer them to an airtight freezer-safe container or bag, separating layers with parchment paper.
They can be frozen for up to 3 months. Thaw them overnight in the refrigerator before serving, and dust with fresh powdered sugar if desired.
Can I Double the Recipe?
Yes, you can easily double this recipe. You will need to use a 9×13 inch baking pan for the doubled amount to maintain the correct thickness.
Baking times may increase slightly due to the larger volume, so monitor for the “gentle wobble” test in the center of the pan. Adjust baking time as needed, typically an additional 5-10 minutes.
Serving Suggestions & Storing Your Zesty Delights
Creative Ways to Serve Your Lemon Bars
While delicious on their own, consider enhancing your lemon bars with a dollop of freshly whipped cream or a side of seasonal berries. A light drizzle of raspberry coulis adds a beautiful color contrast and tangy complement.
For a unique twist, serve them alongside a scoop of vanilla bean ice cream or a sprinkle of toasted coconut. These delightful citrus treats also pair wonderfully with a cup of hot tea or a chilled glass of sparkling water.
Optimal Storage for Peak Freshness
Always store your Classic Lemon Bars in an airtight container in the refrigerator. This is crucial for maintaining their fudgy smooth texture and preventing the filling from softening.
Proper refrigeration ensures they remain fresh and delicious for up to a week. For the best flavor, allow them to sit at room temperature for a few minutes before indulging.
Make-Ahead Magic: Enjoying Them Later
These lemon bars are perfect for making ahead, as they require significant chilling time anyway. Prepare them a day in advance for effortless entertaining or a convenient treat throughout the week.
Their stability and delightful texture make them an ideal dessert to prep for parties, potlucks, or simply to have on hand for a sweet craving. They only get better as flavors meld and the filling fully sets.
Ready to Create Your Own Classic Lemon Bar Masterpiece?
Now armed with the insider secrets, you’re ready to bake a batch of the most delicious Classic Lemon Bars you’ve ever tasted. This recipe promises not just a dessert, but an experience – a perfectly balanced symphony of tart and sweet, with that elusive fudgy smooth texture.
You’ll love the confidence this foolproof method provides, transforming you into a lemon bar master. Don’t hesitate; gather your ingredients and embark on this delightful baking adventure. We encourage you to share your beautiful creations and experience the joy of truly unforgettable citrus treats!

Classic Lemon Bars
Course: DessertCuisine: American CuisineDifficulty: easy16
bars20
minutes40
minutes120
minutesAmerican Cuisine
Ingredients
For the Crust:
1 cup All-Purpose Flour
1/4 cup Powdered Sugar
1/2 cup Cold Unsalted Butter, cut into small cubes
1/4 teaspoon Salt
For the Lemon Filling:
1 1/2 cups Granulated Sugar
1/4 cup All-Purpose Flour
4 large Eggs
1/2 cup Fresh Lemon Juice (about 3-4 lemons)
1 tablespoon Lemon Zest (from about 2 lemons)
For Dusting:
Powdered Sugar
Directions
- Prepare the Crust: Preheat your oven to 350°F (175°C). Line an 8×8 inch baking pan with parchment paper, leaving an overhang on two sides to help lift the bars out later. In a medium bowl, combine 1 cup all-purpose flour, 1/4 cup powdered sugar, and 1/4 teaspoon salt. Add the cold butter cubes and cut them in with a pastry blender, two knives, or your fingertips until the mixture resembles coarse crumbs with some pea-sized pieces of butter remaining. Press this mixture evenly into the bottom of the prepared pan. Bake for 18-20 minutes, or until lightly golden brown. Set aside to cool slightly while you prepare the filling.
- Make the Lemon Filling (The Fudgy Smooth Secret!): In a large bowl, whisk together the 1 1/2 cups granulated sugar and 1/4 cup all-purpose flour until well combined. This is a crucial step! The flour helps create that incredibly stable, fudgy smooth texture without making it dense. Add the 4 large eggs, 1/2 cup fresh lemon juice, and 1 tablespoon lemon zest. Whisk everything together thoroughly until the mixture is completely smooth and no lumps of flour remain. Do not overwhisk, just mix until incorporated.
- Bake to Perfection: Pour the lemon filling evenly over the warm, pre-baked crust. Return the pan to the oven and bake for an additional 20-25 minutes. Here’s the key to that fudgy smooth set: The bars are ready when the edges are lightly golden and set, and the center still has a slight, gentle wobble when you lightly shake the pan. They will continue to set as they cool. Overbaking will make them dry or rubbery, so watch them closely!
- Cooling is Crucial: Remove the pan from the oven and let the lemon bars cool completely at room temperature on a wire rack. For the absolute best fudgy smooth texture and clean cuts, refrigerate the bars for at least 2 hours, or even better, overnight. This chilling time is essential for the filling to fully set and achieve its perfect consistency.
- Serve: Once thoroughly chilled, use the parchment paper overhang to lift the entire slab of lemon bars out of the pan. Place on a cutting board and slice into squares or rectangles. Dust generously with powdered sugar just before serving. Enjoy your perfectly fudgy smooth lemon bars!
Notes
- Chilling for at least 2 hours (or overnight) is crucial for the fudgy texture and clean cuts.