
There’s nothing quite as satisfying as slicing into a beautifully golden Bundt cake, only to find a perfectly moist, tender crumb awaiting you. Yet, many bakers know the disappointment of a dry, crumbly slice. This Classic Vanilla Bundt Cake recipe is my answer to that common challenge.
I’ve spent years perfecting the balance of richness and lightness to create a cake that practically melts in your mouth, consistently delivering pure vanilla bliss. This isn’t just another cake; it’s a reliable masterpiece for any occasion, guaranteed to impress with its incredible texture and authentic flavor.
The Secret to a Consistently Super Moist Classic Vanilla Bundt Cake
Achieving a super moist Bundt cake isn’t magic; it’s a combination of precise techniques and quality ingredients. Our recipe focuses on building moisture and tenderness from the very first step, ensuring every bite is a dream.
Why Our Recipe Delivers a “Melt-in-Your-Mouth” Experience
The core of this recipe’s success lies in its careful balance of fat, sugar, and liquid, alongside specific mixing methods. We eliminate the common pitfall of dryness, delivering a cake that remains incredibly tender and flavorful for days.
This isn’t just about avoiding dry crumbs; it’s about achieving a luxurious texture that feels light yet rich. Each slice of this vanilla Bundt cake truly does melt in your mouth, leaving a delightful lingering sweetness.
Beyond Basic: What Makes This Bundt Cake Truly Special?
This isn’t just a simple vanilla cake. We incorporate several key elements that elevate it far above the ordinary.

Perfect Creaming Method: We emphasize extended creaming of butter and sugar, which incorporates essential air. This step is crucial for a light, airy crumb.
Room Temperature Ingredients: Every ingredient, from eggs to milk, is brought to room temperature. This ensures they emulsify seamlessly, leading to a smooth, uniform batter that bakes beautifully.
Alternating Wet and Dry Additions: This technique, explained in detail, prevents overmixing and gluten development. It’s the secret to that super tender texture you crave in a perfect Bundt cake.
Rich Vanilla Glaze: A simple yet elegant glaze enhances the cake’s flavor and adds a beautiful, professional finish, locking in even more moisture.
Gathering Your Essentials: Ingredients for Classic Perfection
Great baking starts with great ingredients. Here’s a closer look at what you’ll need and why each component is vital for our perfect Classic Vanilla Bundt Cake.
For the Irresistibly Tender Classic Vanilla Bundt Cake Batter
Butter & Sugar: The Foundation of Flavor and Crumb
Unsalted butter, softened: Butter not only provides richness and flavor but, when softened, allows for proper creaming. This process creates tiny air pockets, crucial for a light crumb.
Granulated sugar: Beyond sweetness, sugar tenderizes the cake, prevents it from drying out, and helps achieve that beautiful golden crust. It works in synergy with the butter during creaming.
Eggs & Pure Vanilla Extract: Enriching the Cake’s Soul
Large eggs, at room temperature: Room temperature eggs incorporate more evenly into the batter. This creates a stable emulsion, leading to a smooth batter and a consistently moist cake structure.
Vanilla extract: Opt for high-quality pure vanilla extract. It’s the star flavor, so investing in a good one makes a noticeable difference in the overall taste of your vanilla Bundt recipe.
Flour, Baking Powder, & Salt: Building the Perfect Structure
All-purpose flour: This provides the primary structure for the cake. Measuring it correctly by weight or using the spoon-and-level method is key to avoid a dense cake.
Baking powder: Our leavening agent, it provides the lift and airy texture. Ensure yours is fresh for maximum effectiveness.
Salt: A pinch of salt balances the sweetness and enhances all the other flavors, making the vanilla notes pop.
Whole Milk: The Moisture Keeper’s Secret Weapon
Whole milk, at room temperature: Whole milk contributes richness and keeps the cake incredibly moist. Like the eggs, bringing it to room temperature helps it blend seamlessly into the batter.
Crafting the Dreamy Vanilla Glaze
Powdered sugar: Also known as confectioners’ sugar, this fine sugar creates a silky, smooth glaze that adheres beautifully to the cake. It dissolves easily for a lump-free finish.
Milk or half-and-half: This liquid thins the glaze to the perfect pourable consistency. Using half-and-half adds a touch more richness than regular milk.
Vanilla extract: A second dose of vanilla in the glaze reinforces the cake’s signature flavor. It ties the whole delicious experience together.
Essential Tools for Bundt Cake Success
Having the right equipment on hand simplifies the baking process and sets you up for success. No fancy gadgets required, just a few kitchen basics.
The Star: Choosing and Preparing Your Bundt Pan
10-12 cup Bundt pan: This recipe is designed for a standard-sized Bundt pan. The ornate design of a Bundt pan makes for a stunning presentation with minimal effort.
Thorough greasing and flouring: This step is non-negotiable for a clean release. Use a pastry brush or your fingers to ensure every nook and cranny is coated with butter or shortening, then dust generously with flour.
A little extra care here prevents heartache later. For another foolproof Bundt, you might enjoy our Strawberry Bundt Cake that Never Sticks.
Mixing & Measuring Must-Haves for a Smooth Process
Here are the other tools that will make your Bundt cake journey smooth:
Electric mixer: Essential for properly creaming butter and sugar, and incorporating air into the batter.
Large mixing bowl: For the main batter ingredients.
Separate medium and small bowls: For whisking dry ingredients and combining wet ingredients.
Measuring cups and spoons: Accuracy in baking is paramount for consistent results.
Wire rack: Crucial for cooling the cake evenly and allowing the glaze to set.
Your Step-by-Step Journey to a Flawless Classic Vanilla Bundt Cake
Let’s walk through each step, ensuring you understand the ‘why’ behind the technique. This detailed guide will empower you to create a perfect Classic Vanilla Bundt Cake every time.
-
Prepping for Perfection: Pan & Oven Ready:
Preheat your oven to 350°F (175°C). This ensures the oven is at the correct temperature when the cake goes in, promoting even baking and rise.
Thoroughly grease and flour a 10-12 cup Bundt pan. This is your insurance policy against sticking! Using softened butter or shortening, get into every crevice, then dust with flour, tapping out any excess. This creates a non-stick barrier.
-
Mastering the Batter: Creaming Butter & Sugar:
In a large bowl, combine the softened butter and granulated sugar. With an electric mixer on medium-high speed, cream them together for 3-5 minutes until the mixture is light, pale, and fluffy.
This extended creaming isn’t just mixing; it’s incorporating air, which is fundamental for a tender, open crumb in your finished vanilla Bundt cake.
-
Adding Eggs for Richness and Structure:
Add the large eggs one at a time to the creamed mixture. Beat well after each addition until the egg is fully incorporated into the butter and sugar.
Scrape down the sides of the bowl as needed to ensure everything is evenly mixed. Adding eggs gradually helps maintain the emulsification, preventing a curdled batter.
-
Prepping Dry Ingredients:
In a separate medium bowl, whisk together the all-purpose flour, baking powder, and salt. Whisking ensures the leavening agent and salt are evenly distributed throughout the flour, preventing pockets of unmixed ingredients.
-
Combining Wet Ingredients:
In a small bowl, combine the room temperature whole milk and vanilla extract. This keeps our liquid additions ready for the alternating method.
-
The Moisture Secret: Alternating Dry and Wet Ingredients:
With your mixer on low speed, alternately add the dry ingredients and the wet ingredients to the butter mixture, beginning and ending with the dry ingredients.
Add about a third of the flour mixture, mix gently until just combined. Then add half of the milk mixture, mix again. Follow with another third of the flour, the remaining milk, and finally the last third of the flour. Mix ONLY until just combined after each addition.
This method prevents overmixing, which develops gluten and can lead to a dry, tough cake. The batter should be smooth but avoid excessive beating.
-
Filling the Pan and Preparing for Bake:
Pour the batter evenly into your meticulously prepared Bundt pan. Gently tap the pan on the counter a few times to release any trapped air bubbles, which can cause large holes in your cake.
-
Baking to Golden Perfection:
Bake for 50-60 minutes, or until a wooden skewer or toothpick inserted into the center of the cake comes out clean. If there are wet crumbs, it needs more time. Trust the toothpick test!
-
Initial Cooling in the Pan:
Let the cake cool in the Bundt pan on a wire rack for 15-20 minutes. This crucial cooling time allows the cake to firm up, making it much less likely to stick or break when inverted. Patience is key here!
-
Full Cool Down:
After the initial cooling, invert the cake onto the wire rack and gently lift the pan away. Let the cake cool completely before attempting to glaze. Glazing a warm cake will cause the glaze to melt and run off.
-
Crafting the Dreamy Vanilla Glaze:
In a medium bowl, whisk together the powdered sugar, milk (start with 3 tablespoons and add more slowly if needed), and vanilla extract. Whisk until smooth and pourable.
The ideal consistency is thick enough to cling to the cake but still able to drizzle slowly, not run like water. Adjust with more sugar or milk as necessary.
-
The Grand Finale: Glazing Your Masterpiece:
Once the Classic Vanilla Bundt Cake is completely cool, drizzle the glaze generously over the top. Let it naturally drip down the sides for that beautiful, professional finish. Slice and savor your perfectly moist homemade Bundt cake!
Expert Tips to Elevate Your Classic Vanilla Bundt Cake Game
Beyond the recipe steps, a few expert insights can transform your baking from good to truly exceptional. These Bundt cake tips will ensure consistent perfection.
Room Temperature Rhapsody: Why It Truly Matters
Even Emulsification: When butter, eggs, and milk are all at room temperature, they form a smooth, uniform batter. Cold ingredients won’t emulsify properly, leading to a lumpy batter and a potentially uneven crumb.
Better Air Incorporation: Softened butter creams with sugar more effectively, creating tiny air bubbles. These air pockets are vital for a light, fluffy cake texture.
The Grease and Flour Ritual: A Clean Release Guarantee
Every Crevice Counts: Bundt pans have intricate designs. Use a pastry brush or your fingers to really work the softened butter or shortening into every single groove. Don’t miss a spot!
Even Flour Dusting: After greasing, add a tablespoon or two of flour, then rotate and tap the pan until every greased surface is lightly coated. Invert and tap out all excess flour. This thin, even layer is your best defense against sticking.
Decoding the “Don’t Overmix” Commandment
Gluten Development: Overmixing flour develops gluten, making your cake tough and chewy instead of tender and moist. Once flour is added, mix only until just combined.
Gentle Folding: After the initial wet/dry additions, use a gentle hand when folding in the final portion of flour. A few small lumps are better than an overmixed, tough cake.
The Magic of Cooling: Patience Pays Off
Structural Integrity: The initial 15-20 minutes in the pan allows the cake’s structure to set and firm up. Trying to invert it too soon can lead to breakage or parts sticking to the pan.
Complete Cooling for Glazing: A fully cooled cake ensures your beautiful vanilla glaze sets properly, clinging to the cake rather than melting into it. This creates that desirable drippy effect.
Perfecting Your Glaze Consistency for a Drip-Worthy Finish
Start Slow with Liquid: Always add your milk or half-and-half to the powdered sugar a tablespoon at a time. It’s easier to add more liquid than to fix an overly thin glaze.
Viscous but Flowing: The perfect glaze should be thick enough to coat the back of a spoon and drizzle slowly, creating elegant drips down the sides of your Classic Vanilla Bundt Cake. If it’s too thick, add more liquid; too thin, add more powdered sugar.
Classic Vanilla Bundt Cake Troubleshooting: Solving Common Challenges
Even seasoned bakers encounter hiccups. Here’s how to address common issues and ensure your homemade Bundt cake is a triumph every time.
My Bundt Cake is Dry!
A dry Bundt cake is often the result of overmixing the batter once the flour is added. Overmixing develops gluten, which toughens the crumb and squeezes out moisture. Another culprit can be overbaking; always rely on the toothpick test, not just the timer. Ensure your oven temperature is accurate with a separate thermometer.
Why Did My Cake Stick to the Pan?
This is usually due to insufficient greasing and flouring, especially in the intricate details of the Bundt pan. Make sure every crevice is coated. Also, inverting the cake too soon (before the 15-20 minute cooling period in the pan) or waiting too long to invert can cause sticking. For a similar recipe, check out our Easy Lemon Bundt Cake, which also features tips for a clean release.
My Cake Came Out Dense or Tough!
A dense or tough cake is almost always a sign of overmixing. Once you add the flour, mix only until just combined – a few small lumps are perfectly fine. Cold ingredients can also contribute to a dense texture, as they don’t emulsify as well. Ensure your butter, eggs, and milk are truly at room temperature.
The Glaze is Too Thin or Too Thick
This is an easy fix! If your glaze is too thin and runny, gradually whisk in more powdered sugar, a tablespoon at a time, until it reaches the desired thick, pourable consistency. If it’s too thick, add a tiny bit more milk or half-and-half (1/2 teaspoon at a time) until it’s just right for drizzling over your Classic Vanilla Bundt Cake.
Beyond Baking: Serving, Storing, & Enjoying Your Bundt
You’ve baked a beautiful Classic Vanilla Bundt Cake, now let’s make sure you get the most out of it!
Creative Serving Suggestions for Every Occasion
This vanilla Bundt cake is fantastic on its own, but you can elevate it further. Serve slices with fresh berries, a dollop of lightly sweetened whipped cream, or a scoop of vanilla bean ice cream for a truly decadent dessert.
It also pairs wonderfully with a cup of coffee or tea, making it perfect for an afternoon treat or a simple breakfast indulgence.
Proper Storage for Lasting Freshness
To keep your Bundt cake moist and fresh, store it at room temperature in an airtight container for up to 3-4 days. The glaze helps to seal in the moisture. Avoid refrigerating the entire cake unless absolutely necessary, as it can dry out the crumb.
Make-Ahead Tips for Easy Entertaining
This cake is a fantastic make-ahead option. You can bake the cake a day or two in advance, allowing it to cool completely before storing it, unglazed, in an airtight container. Apply the fresh glaze just before serving for the best presentation and texture.
For longer storage, the unglazed cake freezes beautifully for up to 2-3 months. Wrap it tightly in plastic wrap, then foil, before freezing. Thaw overnight at room temperature before glazing and serving.
Your Classic Vanilla Bundt Cake Questions Answered
Got more questions about this delicious Classic Vanilla Bundt Cake? Here are some common queries we hear.
Can I make this Classic Vanilla Bundt Cake recipe gluten-free?
Yes, you can! Substitute the all-purpose flour with a 1:1 gluten-free baking flour blend that contains xanthan gum. The texture might be slightly different, but you can still achieve a delicious and moist gluten-free Bundt cake.
What if I don’t have a Bundt pan?
While the Bundt shape is iconic, you can still make this recipe. You could use a 10-inch tube pan or divide the batter between two 9×5 inch loaf pans. Adjust the baking time accordingly; loaf cakes or tube cakes will likely bake for a shorter duration, so start checking for doneness around 40-45 minutes.
Can I use different extracts besides vanilla?
Absolutely! Vanilla provides a classic, comforting flavor, but you can certainly experiment. Almond extract, lemon extract, or even a combination like vanilla and a hint of butter emulsion would be delightful. Just be mindful that stronger extracts, like almond, may require slightly less quantity.
How long does Classic Vanilla Bundt Cake last, and can it be frozen?
Properly stored at room temperature in an airtight container, your glazed Classic Vanilla Bundt Cake will stay fresh and delicious for 3-4 days. As mentioned above, the unglazed cake freezes exceptionally well for up to 2-3 months. This makes it perfect for having a delicious dessert ready for any spontaneous occasion.
Ready to Bake Your Best Classic Vanilla Bundt Cake?
Now that you’re armed with all the knowledge and expert tips, you’re ready to create the most incredible, super moist Classic Vanilla Bundt Cake you’ve ever tasted. This recipe promises a tender crumb, rich vanilla flavor, and a stunning presentation that will make any moment special.
Don’t hesitate to dive in and experience the joy of baking this beloved classic. Share your results with us, and if you’re looking for more delightful treats, why not try our Classic Vanilla Cupcakes for individual servings, or explore other fantastic baking ideas on our site?
Happy baking!

Classic Vanilla Bundt Cake
Course: DessertCuisine: American CuisineDifficulty: easy12
servings20
minutes55
minutes120
minutesAmerican Cuisine
Ingredients
For the Cake:
1 cup (2 sticks) unsalted butter, softened
2 cups granulated sugar
4 large eggs, at room temperature
3 cups all-purpose flour
1 tablespoon baking powder
1/2 teaspoon salt
1 cup whole milk, at room temperature
2 teaspoons vanilla extract
For the Glaze:
2 cups powdered sugar
3-4 tablespoons milk or half-and-half
1 teaspoon vanilla extract
Directions
- Preheat your oven to 350°F (175°C). Thoroughly grease and flour a 10-12 cup Bundt pan, ensuring every crevice is coated. This is key for a clean release!
- In a large bowl, cream together the softened butter and granulated sugar with an electric mixer on medium-high speed until the mixture is light, pale, and fluffy, about 3-5 minutes. This step incorporates air, which is fundamental for a tender cake.
- Add the eggs one at a time, beating well after each addition until fully incorporated. Scrape down the sides of the bowl as needed.
- In a separate bowl, whisk together the all-purpose flour, baking powder, and salt.
- In a small bowl, combine the milk and vanilla extract.
- Here’s the secret for that super moist crumb: With the mixer on low speed, alternately add the dry ingredients and the wet ingredients to the butter mixture, beginning and ending with the dry ingredients. Add about a third of the flour mixture, then half of the milk mixture, then another third of the flour, the remaining milk, and finally the last third of the flour. Mix ONLY until just combined after each addition. Overmixing at this stage develops gluten and can lead to a dry, tough cake. The batter should be smooth but don’t beat it excessively.
- Pour the batter evenly into the prepared Bundt pan. Tap the pan gently on the counter a few times to release any air bubbles.
- Bake for 50-60 minutes, or until a wooden skewer or toothpick inserted into the center of the cake comes out clean.
- Let the cake cool in the pan on a wire rack for 15-20 minutes. This crucial cooling time allows the cake to firm up, preventing it from sticking or breaking when inverted.
- Invert the cake onto the wire rack and lift the pan. Let the cake cool completely before glazing.
- For the Glaze: In a medium bowl, whisk together the powdered sugar, milk (start with 3 tablespoons and add more slowly if needed), and vanilla extract until smooth and pourable, but still thick enough to cling to the cake. It should drizzle slowly, not run like water.
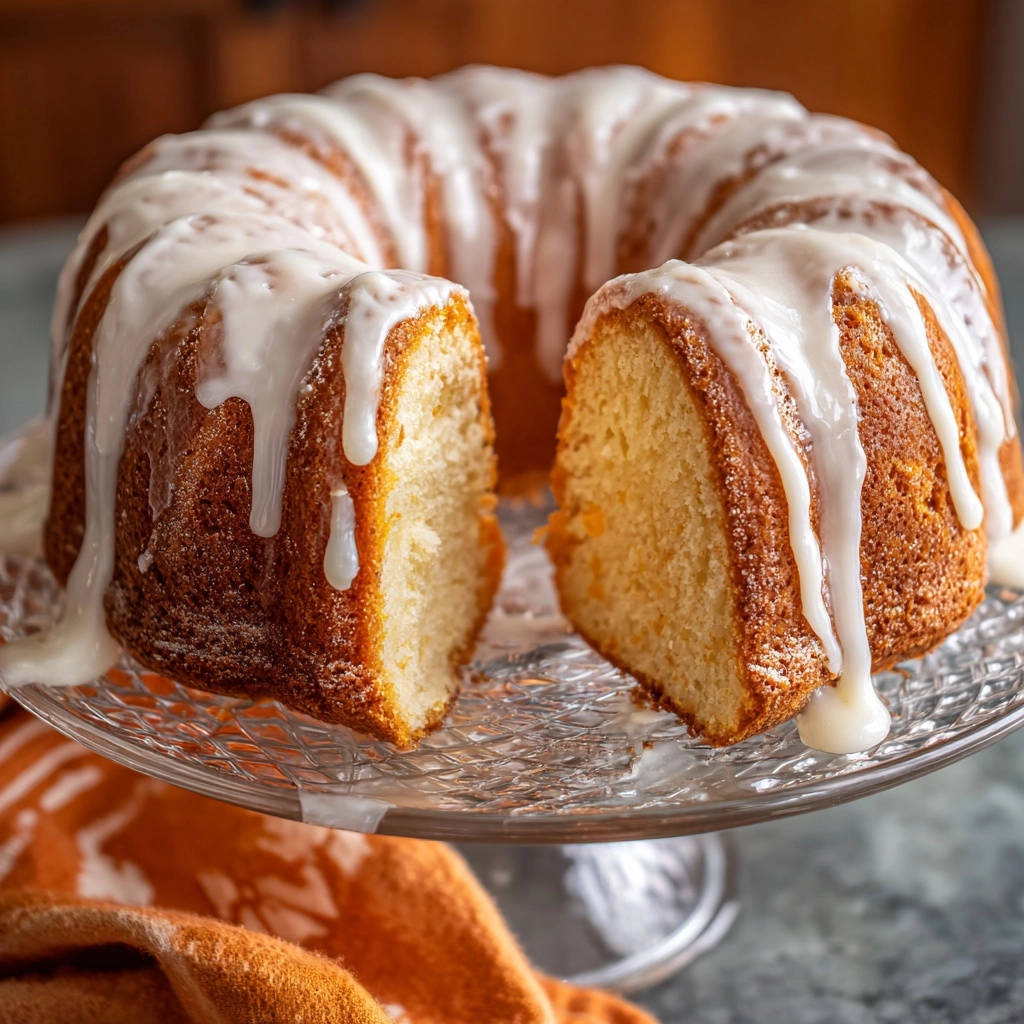
- Once the cake is completely cool, drizzle the glaze generously over the top, letting it drip down the sides for that beautiful finish you see in the picture. Slice and enjoy your perfectly moist Bundt cake!
Notes
- Key steps for a super moist crumb and a clean release from the pan are highlighted in the instructions.


