There’s nothing quite as disappointing as expecting a luscious, rich fruit filling and ending up with a thin, watery mess. As a recipe developer, I’ve spent countless hours perfecting a truly reliable recipe for Homemade Chunky Apple Filling that guarantees perfect consistency every single time.
This recipe isn’t just about delicious flavor; it’s about mastering the art of a thick, non-soupy apple filling that holds its shape beautifully, making your pies, crumbles, and pastries truly shine.
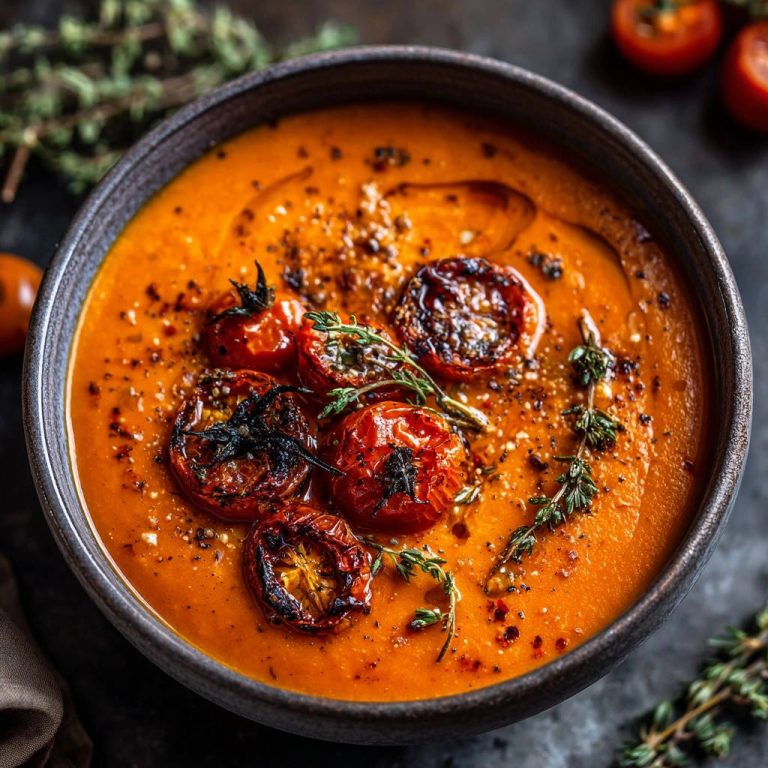
Homemade Chunky Apple Filling: Say Goodbye to Soupy Disasters!
The Perfect Consistency: A Game-Changing Revelation
The dreaded soupy filling is a common lament among home bakers. Many recipes overlook the critical technique that transforms a loose fruit mixture into a beautifully thick, clingy filling. This recipe specifically addresses that by leveraging strategic simmering, ensuring a rich texture.
The secret lies in simmering the apples uncovered, allowing excess moisture to evaporate naturally. This simple yet crucial step concentrates the apple flavors and thickens the sauce without relying on excessive starches.
Why “Chunky” Matters: Texture & Bite
While smooth apple sauces have their place, a truly great apple filling boasts delightful chunks of tender-crisp fruit. This provides a satisfying bite and visual appeal that elevates any dessert.
Our method ensures the apples soften just enough to release their juices and integrate with the sauce, yet retain enough structure for that desirable chunky texture. No mushy apples here!

Versatility in Every Spoonful: Beyond the Pie
While perfect for classic apple pies and tarts, this Homemade Chunky Apple Filling is incredibly versatile. Its robust texture and balanced flavor make it an excellent addition to a wide range of dishes.
Think beyond traditional desserts. This filling is fantastic on pancakes, stirred into oatmeal, or layered in parfaits, adding a burst of autumnal goodness to any meal.
Crafting Flavor: Essential Ingredients for Your Apple Filling
Choosing the Right Apples for Optimal Flavor and Texture
The foundation of any great apple filling is, of course, the apples themselves. Selecting the right varieties is paramount for achieving both optimal flavor and the desired chunky texture.
We recommend a blend of sweet-tart apples like Honeycrisp for sweetness and crispness, combined with tart Granny Smith apples to provide a bright, balanced flavor profile that prevents the filling from becoming overly sweet.
The Sweet & Spicy Harmony
Granulated sugar provides the essential sweetness, balancing the tartness of the apples. The amount can be adjusted to your preference and the sweetness of your chosen apples.
Ground cinnamon is a non-negotiable for that classic apple pie aroma and taste. A touch of optional ground nutmeg adds an extra layer of warm spice, enhancing the overall depth of flavor.
The Unsung Hero: Fresh Lemon Juice
Fresh lemon juice plays a surprisingly vital role in this Homemade Chunky Apple Filling. Its acidity brightens the flavors of the apples and spices, preventing the filling from tasting flat.
Crucially, lemon juice also helps prevent the diced apples from browning excessively during preparation, maintaining an appealing color in your final product.
Gathering Your Gear: Essential Tools for Perfect Apple Filling
Having the right tools on hand makes the process smooth and enjoyable. You won’t need anything fancy for this recipe, just a few kitchen staples.
Large, Heavy-Bottomed Pot: Essential for even heat distribution and preventing sticking, especially during the crucial thickening phase.
Vegetable Peeler and Corer: For efficient apple preparation.
Sharp Knife and Cutting Board: To dice the apples uniformly, ensuring even cooking.
Measuring Cups and Spoons: For precise ingredient measurement.
Heatproof Spatula or Wooden Spoon: For stirring the apples as they cook.
Step-by-Step Mastery: Making Your Homemade Chunky Apple Filling
- Combine Ingredients:
Start by adding your peeled, cored, and uniformly diced apples to a large, heavy-bottomed pot. Uniform dicing ensures the apples cook evenly and retain that desired chunky texture without some pieces becoming mushy while others remain firm.
Next, add the granulated sugar, water, ground cinnamon, optional ground nutmeg, and fresh lemon juice to the pot. Give everything a gentle stir to thoroughly coat the apple pieces with the sugar and spices. This initial coating helps the flavors meld as the cooking process begins.
- Initial Simmer:
Place your pot over medium heat. Bring the mixture to a gentle simmer, stirring occasionally. You’ll notice the apples starting to release their juices, creating a nascent sauce.
A gentle simmer, not a rolling boil, is key here to slowly break down the apples and develop flavor without aggressively cooking them down too quickly.
- The Crucial Thickening Phase:
Once the mixture is simmering, reduce the heat to medium-low. This is the most vital step for achieving that perfect, non-soupy consistency.
Allow the apple mixture to simmer uncovered for 20 to 30 minutes. This open simmering allows steam to escape efficiently, naturally reducing the liquid and thickening the sauce. Stir every few minutes, especially as the mixture thickens, to prevent any sticking to the bottom of the pot.
Continue simmering until the apples are tender but still retain their shape, and the sauce has visibly thickened to your liking. It should cling to the apples, not run off them. The visual cue here is a bubbling, viscous sauce that coats the back of a spoon.
- Cooling & Final Thickening:
Once the apple filling has reached your desired tenderness and sauce consistency, remove the pot from the heat. This step is often overlooked but is crucial for the final texture.
Allow the Homemade Chunky Apple Filling to cool completely, directly in the pot. As it cools, the natural pectin in the apples, combined with the sugar, will continue to set and thicken the filling even further, resulting in a perfectly robust texture.
- Storage:
Once completely cooled, transfer your luscious apple filling to an airtight container or jar. Properly stored, it will keep beautifully in the refrigerator for up to one week.
For longer preservation, you can freeze the filling for several months. Just be sure to leave a little headspace in your container for expansion. When ready to use, simply thaw in the refrigerator overnight.
Unlock Flavor Secrets: Pro Tips for Your Apple Filling
Mastering the Simmer for Ideal Thickness
The 20-30 minute simmering window is a guideline; your goal is visual consistency. Look for the sauce to reduce by about a third and for bubbles to become larger and thicker, indicating less water content.
A simple test: lift a spoonful of filling; if the liquid slowly drips off the apples and coats the spoon, it’s likely ready. If it runs off quickly, keep simmering!
Customizing Sweetness and Spice
Always taste your apples before adding sugar. Very tart apples like Granny Smiths might need the full 1/2 cup of sugar, while sweeter varieties like Honeycrisp could require less.
You can adjust the cinnamon and nutmeg to suit your palate. For an extra kick, a tiny pinch of ground cloves or allspice can add complexity, but use sparingly.
Preventing Scorching and Sticking
Using a heavy-bottomed pot is your first line of defense against sticking. This type of pot distributes heat more evenly, reducing hot spots.
Consistent stirring, especially in the last 10-15 minutes of simmering, is paramount. As the liquid reduces, the sugars can caramelize and stick quickly, so keep an eye on it.
Adding Depth: Extra Flavor Boosts
For a richer, more complex flavor profile, consider adding a teaspoon of pure vanilla extract off the heat, just before cooling. Its warmth beautifully complements the apple and spice notes.
A tiny pinch of salt can also surprisingly enhance the sweetness and overall flavor balance, much like it does in baking. For an adult twist, a splash of bourbon or apple brandy adds incredible depth.
Common Pitfalls & Easy Fixes for Apple Filling
My Filling is Too Soupy!
If your Homemade Chunky Apple Filling turns out thinner than desired, don’t despair! The easiest fix is to return it to the pot and continue simmering it uncovered over medium-low heat.
Allow more time for the excess moisture to evaporate. If you’re in a hurry, you can dissolve 1-2 teaspoons of cornstarch in a tablespoon of cold water, then whisk it into the simmering filling and cook for another minute or two until thickened.
The Apples Aren’t Tender Enough!
If your apples are still too firm after the recommended simmering time, simply continue cooking them. Different apple varieties vary in density and cooking time.
Covering the pot briefly for 5-10 minutes can also help steam the apples and speed up softening, then remove the lid to continue reducing the sauce.
My Filling Tastes Bland!
A bland apple filling often means it needs a flavor boost. While the filling is still warm, taste it again.
You can stir in a little more sugar, a generous pinch of cinnamon, or another squeeze of fresh lemon juice to brighten the flavors. A tiny pinch of salt can also make a surprising difference.
Beyond the Pie: Enjoying & Storing Your Homemade Chunky Apple Filling
Creative Ways to Serve This Delicious Filling
This versatile Homemade Chunky Apple Filling goes far beyond traditional desserts. Spoon it generously over fluffy pancakes or waffles for a delightful breakfast.
Layer it with yogurt and granola for a quick, wholesome parfait. Use it as a luscious topping for ice cream or even as a filling for apple crepe enchiladas for a unique dessert.
It’s also wonderful in apple crisps, crumbles, or as a filling for turnovers. For a delightful twist, try it as a topping for peach cobbler, blending the fruit flavors.
Storage & Make-Ahead Magic
Once completely cooled, store your apple filling in an airtight container in the refrigerator for up to 7 days. This makes it a fantastic make-ahead component for various dishes.
For longer storage, freeze the filling in freezer-safe containers for up to 3 months. Thaw it in the refrigerator overnight before using. You can gently rewarm it on the stovetop if desired, adding a splash of water if it seems too thick after thawing.
Your Homemade Apple Filling Questions Answered
Can I use different types of apples for this recipe?
Absolutely! While Honeycrisp and Granny Smith are recommended for their balance, you can experiment with other firm, tart-sweet apples like Braeburn, Fuji, Gala, or Golden Delicious. Softer apples will break down more quickly, so adjust simmering time accordingly.
Can I reduce the amount of sugar?
Yes, you can certainly reduce the sugar to taste, especially if your chosen apples are on the sweeter side. Keep in mind that sugar not only sweetens but also contributes to the sauce’s body and helps with preservation, so a significant reduction might slightly alter consistency and shelf life.
How long does Homemade Chunky Apple Filling last?
Stored in an airtight container, your homemade filling will last for up to one week in the refrigerator. If frozen, it can maintain its quality for up to three months.
Can I make this filling ahead of time?
Making this filling ahead of time is highly recommended! It’s perfect for meal prep, allowing you to have a delicious component ready for quick desserts or breakfast additions throughout the week. Plus, flavors often deepen after a day or two.
Is this recipe suitable for canning?
While this recipe produces a delicious filling, it is not formulated or tested for safe home canning. For canning purposes, you would need to follow a tested, USDA-approved recipe that accounts for proper acidity and processing times to ensure food safety.
Ready to Impress? Share Your Culinary Creation!
You now possess the secret to making truly exceptional Homemade Chunky Apple Filling, free from the disappointment of watery results. This versatile, flavorful recipe is sure to become a cherished staple in your kitchen, elevating everything from simple breakfasts to elaborate desserts.
Go ahead, bake that pie, top those pancakes, or simply enjoy it by the spoonful. We can’t wait to see what delicious creations you whip up with this perfect apple filling!

Homemade Chunky Apple Filling
Course: BakingCuisine: American CuisineDifficulty: easy15
minutes30
minutes45
minutesAmerican Cuisine
N/A
Ingredients
6 medium apples, like Honeycrisp or Granny Smith, peeled, cored, and diced into 1/2 inch pieces
1/2 cup granulated sugar, or to taste
1/4 cup water
1 teaspoon ground cinnamon
1/4 teaspoon ground nutmeg (optional, but enhances flavor)
1/2 teaspoon fresh lemon juice
Directions
- In a large, heavy-bottomed pot, combine the diced apples, granulated sugar, water, ground cinnamon, ground nutmeg if using, and fresh lemon juice. Stir everything together gently to coat the apples.
- Place the pot over medium heat. Bring the mixture to a gentle simmer, stirring occasionally.
- Once simmering, reduce the heat to medium low. This is the crucial step for achieving perfect consistency: allow the mixture to simmer uncovered for 20 to 30 minutes, or until the apples are tender but still hold their shape, and the sauce has significantly thickened. Stir every few minutes, especially towards the end, to prevent sticking and ensure even cooking. The open pot allows steam to escape, reducing the liquid naturally and preventing a watery sauce.
- Remove the pot from the heat and let the apple filling cool completely. As it cools, it will continue to thicken even more.
- Transfer the cooled apple filling to an airtight container or jar. Store in the refrigerator for up to one week, or freeze for longer storage.
Notes
- Store in refrigerator for up to one week, or freeze for longer storage.