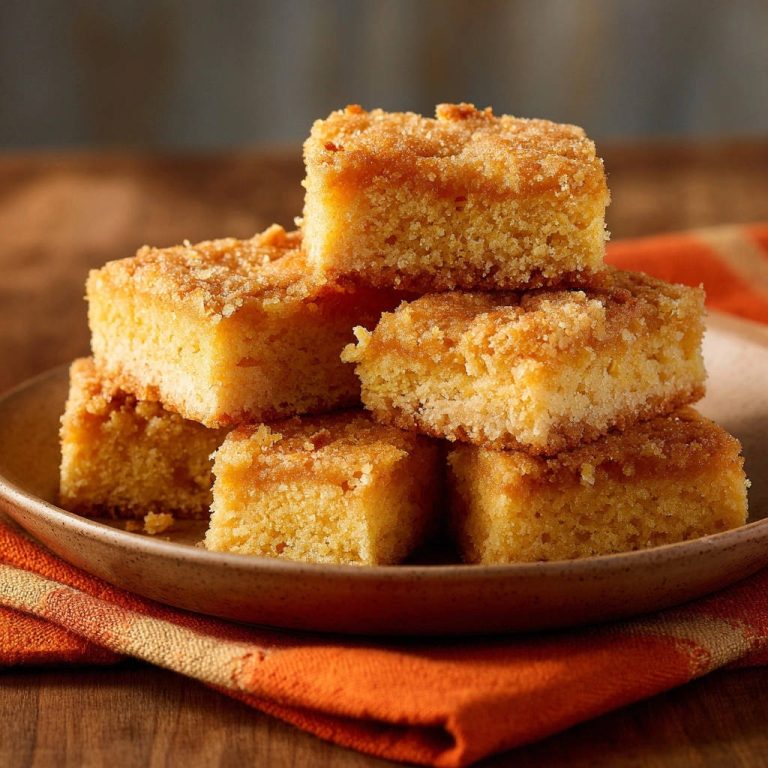
Why This Rustic Basque Cheesecake Will Be Your Go-To Dessert
This recipe isn’t just about deliciousness; it’s about reliable success and unforgettable texture. Its unique qualities make it a standout choice for any dessert occasion.Effortless Elegance for Any Occasion
Despite its impressive appearance and rich flavor, this cheesecake is surprisingly simple to master.
It’s perfect for bakers of all skill levels, from beginners to seasoned pros looking for a showstopper with minimal stress.
The Unforgettable Gooey, Custardy Center
The hallmark of this particular Rustic Basque Cheesecake is its signature interior: deeply custardy and delightfully gooey.
Every slice promises that luxurious melt-in-your-mouth experience that has made this dessert famous.
No More Dense or Dry Cheesecake!
Unlike traditional cheesecakes that often suffer from overbaking, this recipe embraces a “burnt” exterior and a delicate, creamy interior.
Say goodbye to disappointing, dry results; this method guarantees a consistently light and luscious texture.

The Core Ingredients for Authentic Rustic Basque Cheesecake
High-quality ingredients are the foundation of any great dessert. Here’s a brief look at the stars of this show and their crucial roles.Cream Cheese: The Foundation of Flavor
Softened cream cheese is non-negotiable for a smooth, lump-free batter.
It provides the rich, tangy base that defines this decadent dessert.
Sugar & Eggs: Sweetness and Structure
Granulated sugar adds essential sweetness and contributes to the caramelized crust.
Room temperature large eggs bind the ingredients, creating structure and richness while keeping the final product tender.
Heavy Cream & Vanilla: Richness and Aroma
Heavy cream is key to the cheesecake’s luxurious, silky texture, ensuring ultimate creaminess.
Vanilla extract enhances the overall flavor profile, adding a warm, aromatic depth.
A Touch of Flour & Salt: The Unsung Heroes
A small amount of all-purpose flour provides just enough structure to prevent the cheesecake from collapsing.
Salt is vital for balancing the sweetness and enhancing all the other flavors, making them pop.
Tools for Rustic Basque Cheesecake Success
Having the right equipment makes the baking process smoother and ensures the best possible outcome for your Rustic Basque Cheesecake.Must-Have Baking Essentials
9-inch Springform Pan: This pan with removable sides is essential for easy release and presentation.
Parchment Paper: Crucial for lining the pan, allowing the cheesecake to climb high and creating that signature crinkled, rustic edge.
Large Mixing Bowls: Necessary for combining your ingredients without spills.
Helpful Kitchen Gadgets
Electric Mixer: A handheld or stand mixer makes quick work of beating the cream cheese and sugar until perfectly smooth.
Whisk: Useful for ensuring ingredients are fully incorporated, especially when adding wet ingredients.
Measuring Tools: Accurate measuring cups and spoons are vital for consistent results in baking.
Your Path to Rustic Basque Cheesecake Perfection: A Detailed Guide
Follow these steps precisely to achieve the signature “burnt” exterior and luscious, gooey interior of this Rustic Basque Cheesecake.- Prepare Your Pan and Oven:
Preheat your oven to 400 degrees F (200 degrees C).
Line a 9-inch springform pan with two pieces of parchment paper, letting them crinkle and extend high above the rim of the pan. This rustic look is part of the charm and helps achieve the signature Basque cheesecake aesthetic while preventing overflow.
- Cream Cheese and Sugar to Smooth Perfection:
In a large mixing bowl, beat the softened cream cheese and granulated sugar together with an electric mixer until smooth and creamy, about 2 to 3 minutes.
Ensure there are absolutely no lumps in the mixture for a truly silky batter and consistent texture.
- Incorporate Eggs Carefully:
Add the eggs one at a time, mixing well after each addition until just combined.
Be careful not to overmix at this stage, as incorporating too much air can negatively affect the final tender texture of your cheesecake, making it less dense and custardy.
- Fold in the Cream and Vanilla:
Gradually pour in the heavy cream and vanilla extract, mixing on low speed until just incorporated.
The goal is to gently blend these liquids into the batter, not to whip them, which helps maintain the desired rich density.
- Sift and Mix Dry Ingredients:
Sift in the flour and salt directly over the batter.
Mix on low speed until the batter is smooth and lump-free, again, being careful not to overmix. For this particular cheesecake, a slightly lumpy batter is actually better than an overmixed one, as overmixing can lead to a tougher consistency.
- Pour and Prepare for Baking:
Carefully pour the prepared batter into your parchment-lined springform pan.
The crinkled parchment paper should extend well above the batter, allowing the cheesecake to rise without spilling over.
- Bake to Caramelized Perfection:
Bake for 50 to 60 minutes, or until the top is deeply caramelized and dark brown, almost burnt-looking.
Crucially, the edges should be set but the center must still be very jiggly when gently shaken. This significant jiggly center is absolutely key to that custardy, gooey texture that defines Rustic Basque Cheesecake!
- The Slow Cool-Down (Crucial Step!):
Once baked, turn off the oven and prop the oven door open slightly with a wooden spoon.
Let the cheesecake cool in the oven for about 30 minutes. This slow cooling helps prevent sudden temperature shock, which can cause cracks, and ensures a smooth transition to room temperature, contributing to its luscious texture.
- Cool Completely on a Wire Rack:
Remove the cheesecake from the oven and let it cool completely on a wire rack at room temperature for at least 3 hours.
Resist the urge to move it to the fridge too soon; full cooling at room temperature further aids in setting the structure.
- Chill for Ultimate Gooeyness:
Once completely cooled, transfer the cheesecake to the refrigerator and chill for at least 4 hours, or preferably overnight, before slicing and serving.
This extended chilling time is crucial for the cheesecake to fully set into that famous custardy, gooey texture, making it easy to slice and even more delightful to eat.
Chef’s Secrets: Elevate Your Rustic Basque Cheesecake Game
Beyond the basic instructions, these expert tips will ensure your Rustic Basque Cheesecake is truly exceptional.Mastering the Mix: Don’t Overwork It!
The less air you incorporate, especially after adding eggs and flour, the denser and more custardy your Rustic Basque Cheesecake will be.
Mix only until just combined to prevent a cakey texture and ensure that signature gooey center.
Achieving that Deeply Caramelized Top
The high baking temperature is intentional; it creates the signature dark, almost “burnt” top, which contributes a unique bittersweet, caramelized flavor to your Basque cheesecake.
Don’t be afraid of the color; it’s what makes this dessert special and contrasts beautifully with the creamy interior.
The Jiggly Center Revelation
Unlike traditional cheesecakes that are baked until mostly firm, a Rustic Basque Cheesecake is meant to be very jiggly in the center when removed from the oven.
This distinct wobble indicates that the center will become perfectly custardy and molten after cooling.
The Importance of Slow Cooling
Allowing the cheesecake to cool gradually in the turned-off oven prevents rapid temperature changes, which are a primary cause of cracks in cheesecakes.
This method also promotes a more tender, even texture throughout the dessert.
Patience Pays Off: Chilling for Perfection
The minimum 4-hour, and preferably overnight, chilling period is non-negotiable for the Rustic Basque Cheesecake.
This time allows the internal structure to fully set and solidify into that iconic, luscious gooey consistency, making it easier to slice and enhancing the flavor.
Troubleshooting Your Rustic Basque Cheesecake: Common Fixes
Even with the best instructions, sometimes things go awry. Here’s how to address common issues.Why is My Cheesecake Cracking?
Cracking usually indicates too rapid cooling or slight overbaking. Ensure you follow the slow cooling step in the turned-off oven.
Also, make sure your eggs and cream cheese are at room temperature to prevent temperature shock in the batter.
My Cheesecake Isn’t Gooey Enough!
This is often due to overbaking. The center must be very jiggly when removed from the oven.
Another culprit could be insufficient chilling time; the cheesecake needs ample time in the refrigerator to fully develop its custardy texture.
The Top Isn’t Caramelized
If your top isn’t dark enough, your oven temperature might be inaccurate or your baking time too short.
Ensure your oven is preheated fully and that the pan is placed in the center of the oven for even heat distribution.
My Cheesecake is Too Dense
Overmixing, especially after adding the eggs and flour, can incorporate too much air, leading to a cake-like, dense texture rather than the desired custardy one.
Be gentle and mix only until ingredients are just combined for the ideal richness.
Beyond the Bake: Serving & Enjoying Your Rustic Basque Cheesecake
Once chilled, your Rustic Basque Cheesecake is ready to impress. Here’s how to best enjoy and store it.Perfect Pairings: What to Serve With It
The intense flavor of Rustic Basque Cheesecake shines on its own, but a simple dusting of powdered sugar adds elegance.
For a burst of freshness, serve slices with fresh berries like raspberries or strawberries, or a light dollop of unsweetened whipped cream to complement its richness.
Storing Your Leftovers Like a Pro
Store any leftover cheesecake in an airtight container in the refrigerator for up to 3-4 days.
Allowing it to come to room temperature for about 15-20 minutes before serving can enhance its texture and flavor.
Can I Make Rustic Basque Cheesecake Ahead?
Absolutely! This cheesecake is an excellent make-ahead dessert, with its flavors and texture actually improving over time.
Preparing it a day in advance allows for crucial overnight chilling, ensuring the perfect gooey consistency and a stress-free dessert presentation.
Your Rustic Basque Cheesecake Questions Answered
Here are some common questions about making this unique and delicious cheesecake.Can I use a different size pan?
You can adjust the pan size, but it will require changes to baking time and potentially ingredient quantities. For a smaller pan, decrease ingredients and baking time; for a larger one, increase them. Always look for that signature jiggly center.
Is this cheesecake gluten-free?
The recipe uses all-purpose flour. You can experiment with a 1:1 gluten-free baking flour blend, but be aware that the texture might vary slightly. For another delightful dessert, you might enjoy our Classic Chocolate Layer Cake, which offers a different kind of sweet indulgence.
Why is the top so dark?
The deeply caramelized, dark top is the defining characteristic of a Basque cheesecake. It’s not burnt, but caramelized sugar that creates a delightful bittersweet contrast to the creamy interior, delivering a complex flavor profile unique to this dessert.
How do I know when it’s done?
The key indicator is a very jiggly center when you gently shake the pan. The edges will be set, but the middle should still wobble significantly like soft Jell-O. This is critical for achieving that custardy, gooey perfection, unlike traditional cheesecakes that bake until firm.
Ready to Impress? Share Your Rustic Basque Cheesecake Masterpiece!
There’s immense satisfaction in pulling off a dessert that looks sophisticated yet is incredibly simple to create. This Rustic Basque Cheesecake is a testament to that, delivering a truly unique and irresistible experience. Its gooey, custardy center and beautifully caramelized top will surely be the talk of any gathering. I encourage you to try this recipe and discover the joy of effortless, gooey perfection. Don’t hesitate to explore our other fantastic dessert recipes, such as our Salted Caramel Chocolate Squares, for more sweet inspirations! Share your delicious creations and tag us – we love seeing your culinary triumphs!
Rustic Basque Cheesecake
Course: DessertCuisine: Mediterranean cuisineDifficulty: easy10
servings20
minutes1
hourMediterranean cuisine
Ingredients
32 ounces cream cheese, softened
1 1/4 cups granulated sugar
4 large eggs, at room temperature
2 cups heavy cream
1 teaspoon vanilla extract
1/4 cup all purpose flour
1/4 teaspoon salt
Directions
- Preheat your oven to 400 degrees F (200 degrees C). Line a 9-inch springform pan with two pieces of parchment paper, letting them crinkle and extend high above the rim of the pan. This rustic look is part of the charm!
- In a large mixing bowl, beat the softened cream cheese and granulated sugar together with an electric mixer until smooth and creamy, about 2 to 3 minutes. Make sure there are no lumps.
- Add the eggs one at a time, mixing well after each addition until just combined. Be careful not to overmix, as incorporating too much air can negatively affect the final texture.
- Gradually pour in the heavy cream and vanilla extract, mixing on low speed until just incorporated.
- Sift in the flour and salt. Mix on low speed until the batter is smooth and lump-free, again, being careful not to overmix. A slightly lumpy batter is better than an overmixed one for this cheesecake.
- Pour the batter into the prepared springform pan.
- Bake for 50 to 60 minutes, or until the top is deeply caramelized and dark brown, almost burnt-looking, and the edges are set but the center is still very jiggly when gently shaken. This significant jiggly center is absolutely key to that custardy, gooey texture!
- Turn off the oven and prop the oven door open slightly with a wooden spoon. Let the cheesecake cool in the oven for about 30 minutes. This slow cooling helps prevent cracks and ensures a smooth transition to room temperature.
- Remove the cheesecake from the oven and let it cool completely on a wire rack at room temperature for at least 3 hours.
- Once completely cooled, transfer the cheesecake to the refrigerator and chill for at least 4 hours, or preferably overnight, before slicing and serving. This chilling time is crucial for the cheesecake to fully set into that famous custardy, gooey texture.
Notes
- Do not overmix the batter. For the best custardy texture, ensure a very jiggly center after baking and allow for slow cooling and thorough chilling.