Have you ever spent hours lovingly baking and assembling a beautiful layer cake, only to slice into it and find the bottom layers disappointingly soggy? It’s a common baking heartbreak! Especially when you’re working with juicy fresh fruit like strawberries and creamy fillings, moisture can be the enemy of a perfectly light and airy sponge. But don’t despair! I’ve finally mastered a simple yet incredibly effective technique that guarantees a delightful Strawberry Dream Layer Cake every single time, with layers that remain tender and distinct, never a wet, mushy mess. This isn’t just a cake; it’s a dream realized, where every forkful offers a perfect balance of sweet berries, smooth cream cheese, and delicate sponge.
This recipe features a classic vanilla cake base, generously filled with a homemade pink strawberry cream cheese filling, all enveloped in fluffy whipped cream frosting and a crunchy cookie crumb coating. The secret to avoiding that dreaded sogginess lies in smart assembly and crucial chilling steps that create a moisture barrier, ensuring your beautiful layers stay that way until the very last slice. Get ready to bake the Strawberry Dream Layer Cake you’ve always dreamed of!
Why You’ll Adore This Strawberry Dream Layer Cake
Beyond simply avoiding soggy cake layers (which is reason enough!), there are so many reasons this Strawberry Dream Layer Cake will become your go-to celebration dessert:
- Perfect Texture Balance: You get the delightful contrast between the light, airy cake sponge, the smooth and slightly tangy strawberry cream cheese filling, the fluffy whipped cream, and the crunchy cookie crumbs.
- Bursting with Fresh Strawberry Flavor: This cake celebrates fresh strawberries in both the cooked filling and as optional fresh fruit layers, providing authentic, vibrant taste.
- Absolutely NO Soggy Sponge: Thanks to the special layering and chilling technique, the cake stays beautifully textured, even days after assembly.
- Visually Stunning: The layers of pink filling, white frosting, and red strawberries make for a gorgeous presentation that’s perfect for birthdays, holidays, or just because!
- Easier Than You Think: While it’s a layered cake, the individual components are straightforward to make, and the assembly method simplifies the process.
Gathering Your Ingredients for This Dreamy Cake
Creating this beautiful cake requires a few distinct sets of ingredients, each playing a vital role in achieving the perfect texture and flavor profile. We start with the simple yet reliable components for our cake layers, move onto the star ingredient for that vibrant pink strawberry filling, and finish with the creamy frosting and delightful crumb coating. Using high-quality, fresh ingredients makes a noticeable difference in the final taste!
Here’s what you’ll need:
- For the Cake Layers: You’ll need standard pantry staples like all-purpose flour, granulated sugar for sweetness, baking powder for lift, and a touch of salt to balance the flavors. Softened unsalted butter contributes tenderness and richness, while large eggs bind everything together and add structure. Milk provides necessary moisture, and vanilla extract infuses that classic, comforting flavor. Ensure your butter, eggs, and milk are at room temperature for optimal mixing and a tender crumb.
- For the Pink Strawberry Layer: Fresh strawberries are key here! They’re mashed and cooked down with a bit of powdered sugar for sweetness and cornstarch dissolved in water to create a thickened, stable base. This cooked mixture is then folded into softened cream cheese combined with more powdered sugar and vanilla extract for a tangy-sweet creaminess. Finally, whipped heavy cream is gently folded in to make the filling light and airy. Using fresh, ripe strawberries will give you the best color and flavor.
- For the Whipped Cream Frosting: Just three simple ingredients come together for this essential topping: cold heavy cream, powdered sugar for sweetness and stability, and vanilla extract for flavor. Make sure your cream is very cold for the best whipping results.
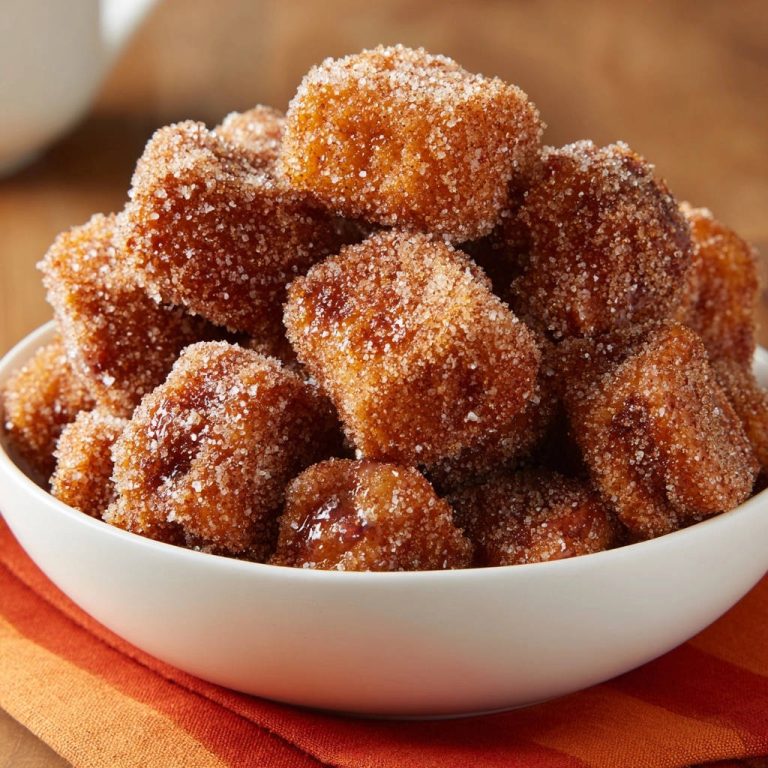
- For the Crumb Coating & Topping: Crushed shortbread cookies or vanilla wafers provide a delightful textural element around the outside of the cake. Fresh strawberries are used for both optional layering within the cake and as the beautiful final touch for decoration.
Crafting Your Strawberry Dream Layer Cake: Step-by-Step
Let’s walk through the process of bringing this showstopper cake to life! Each step is designed for success, ensuring your layers are light, your filling is flavorful, and your final cake is a non-soggy masterpiece. Remember to take your time and enjoy the process – baking should be fun!

-
Prepare Your Workspace: Begin by preheating your oven to 350 degrees F (175 degrees C). This ensures your oven is at the correct temperature before the batter goes in, promoting even baking. Prepare two 8-inch cake pans by generously greasing them and then dusting them with flour. This crucial step helps prevent the cakes from sticking and ensures they release cleanly after baking.
-
Bake the Perfect Sponge Layers: In a large mixing bowl, combine your dry cake ingredients: flour, granulated sugar, baking powder, and salt. Give them a quick whisk to distribute everything evenly. Add the softened butter and mix it into the dry ingredients until the mixture resembles coarse crumbs. This technique helps coat the flour particles, contributing to a tender cake. In a separate bowl, whisk together the wet ingredients: eggs, milk, and vanilla extract. Gradually add this wet mixture to the dry ingredients, mixing on low speed or by hand just until everything is combined and no dry streaks remain. Be careful not to overmix, as this can develop the gluten too much, resulting in a tough cake. Divide the batter evenly between your prepared pans and smooth the tops. Bake for 25-30 minutes, or until a wooden skewer inserted into the center of each cake comes out clean, indicating they are fully baked. Allow the cakes to cool in their pans for about 10 minutes before inverting them onto a wire rack to cool completely. It’s absolutely essential that the cake layers are entirely cool before you try to slice or assemble them. Once cool, if your cake tops aren’t perfectly flat, use a serrated knife to gently level them. Then, carefully slice each cake layer horizontally through the middle to create four thinner layers total. This gives you more layers for that impressive stacked look!
-
Whip Up the Pink Strawberry Delight: Now for that luscious filling! In a small saucepan, combine the mashed fresh strawberries, 1/4 cup powdered sugar, cornstarch, and water. Stir everything together until smooth. Place the saucepan over medium heat and cook, stirring constantly with a whisk or rubber spatula. You’ll notice the mixture starting to thicken as the cornstarch activates – this usually takes about 5-7 minutes. Cook until it’s bubbling and noticeably thicker, resembling a soft jam or pudding. Remove the saucepan from the heat and transfer the mixture to a bowl to cool completely. This is important; adding a warm filling to cream cheese or whipped cream will ruin their texture. While that cools, beat the softened cream cheese in a separate bowl with 1/2 cup powdered sugar and vanilla extract until it’s smooth and creamy, with no lumps. Once the cooked strawberry mixture is totally cool, gently fold it into the cream cheese mixture until streaks of pink are distributed throughout. Don’t overmix, you still want some variation in color. Finally, in a cold bowl, whip the heavy cream until stiff peaks form (you’ll use this later for the frosting too, so you might want to whip it all at once and reserve some). Gently fold 1 cup of this whipped cream into the strawberry cream cheese mixture. This folding technique keeps the filling light and airy. Be careful not to deflate the whipped cream.
-
Prepare the Fluffy Whipped Cream Frosting: If you didn’t whip all the cream in the previous step, do it now. Using a chilled bowl and cold heavy cream is key for maximum volume and stability. Add the remaining 2 cups of heavy cream, 1/2 cup powdered sugar, and vanilla extract to the cold bowl. Beat with an electric mixer or whisk until stiff peaks form. This means when you lift the whisk or beaters, the peaks stand straight up without collapsing. Be careful not to overbeat, or you’ll end up with butter!
-
Assemble the Cake Like a Pro (The Anti-Soggy Secret!): This is where the magic happens to prevent soggy layers. Place your first cake layer on the serving plate or cake stand you plan to use. Spread half of the prepared pink strawberry filling evenly over this layer. Because this filling has a stable base (thanks to the cooked strawberry mixture and cream cheese), it acts as a wonderful barrier! It protects the delicate cake sponge from absorbing excess moisture from any fresh fruit you might add. If you’re using them, arrange a single layer of sliced fresh strawberries over the pink filling. Place the second cake layer gently on top. Spread the remaining pink strawberry filling over this second layer. Add more sliced strawberries if desired. Place the third cake layer on top. Now, switch to the whipped cream frosting you prepared. Spread half of the whipped cream frosting evenly over this third layer. Add another layer of sliced strawberries if you like. Finally, carefully place the fourth and final cake layer on top.
-
Chill for Structure and Protection: This is arguably the most critical step for that non-soggy guarantee! Apply a thin layer of whipped cream (this is your crumb coat) all over the entire cake – the top and the sides. This helps to seal in crumbs and provide a base for the final frosting layer. Once crumb coated, immediately place the cake in the refrigerator to chill for at least 2 hours. This chilling time allows the cake layers to settle, and more importantly, it gives the strawberry filling time to firm up significantly. As it firms, it solidifies into a stronger barrier, locking moisture within the filling itself and preventing it from seeping into the cake layers. This step makes all the difference!
-
Decorate Your Masterpiece: Once the cake has chilled and the crumb coat is firm, it’s time for the final decorative touches. Apply the remaining whipped cream frosting smoothly and evenly over the chilled, crumb-coated cake. Get creative with swirling or smoothing techniques! Next, take your crushed shortbread cookies or vanilla wafers. Gently press them onto the sides of the cake, working your way around the entire circumference. You can also press some onto the top edge for a finished look. Finish the cake by piping swirls of the remaining whipped cream on top and arranging fresh strawberry slices decoratively. You can arrange them whole, halved, or sliced for different looks.
-
The Final, Essential Chill: For the absolute best texture, cleanest slices, and zero risk of sogginess, return the fully decorated cake to the refrigerator for at least another 2 hours. Chilling it overnight is even better! This final chill allows all the layers, fillings, and frosting to set completely, making the cake easy to slice beautifully and ensuring every component is perfectly firm and delicious. Patience truly pays off in this last step!
Tips for Baking a Perfect Strawberry Dream Layer Cake
Achieving cake perfection is within reach! Here are a few extra tips to help you succeed with your Strawberry Dream Layer Cake:
- Room Temperature Ingredients: For the cake batter, ensure your butter, eggs, and milk are at room temperature. This allows them to emulsify better, resulting in a smoother batter and a more tender, evenly textured cake.
- Don’t Overmix: When combining wet and dry ingredients for the cake batter, stop mixing as soon as no dry streaks are visible. Overmixing can lead to a tough cake.
- Cooling is Non-Negotiable: Make sure both the baked cake layers and the cooked strawberry mixture are completely cool before assembly. Warm components will cause the cream cheese or whipped cream to melt, leading to a messy cake and potential sogginess.
- Whip Cream in a Cold Bowl: For the best, most stable whipped cream, chill your mixing bowl and beaters in the freezer for 10-15 minutes before whipping the cold heavy cream.
- Slice Layers Carefully: Use a long serrated knife and a gentle sawing motion to slice the cake layers horizontally. Keeping your knife level will help ensure even layers. You can even use toothpicks inserted around the cake’s circumference as a guide.
- The Crumb Coat is Your Friend: Don’t skip the crumb coat! It traps loose crumbs and creates a smooth surface for your final layer of frosting, giving your cake a professional finish.
- Substitution for Crumb Coating: If shortbread or vanilla wafers aren’t your thing, you could use graham cracker crumbs, crushed almond cookies, or even finely chopped nuts for a different flavor profile, keeping in mind allergies.
What to Serve With Your Strawberry Dream Layer Cake
This cake is a showstopper on its own, but a few simple additions can make serving it even more special. A scoop of good quality vanilla ice cream is a classic pairing. For something lighter, a simple garnish of extra fresh strawberries or a light drizzle of strawberry coulis (just pureed strawberries!) works beautifully. If you’re hosting a gathering, serving it alongside a selection of light pastries or perhaps some classic chocolate chip cookies or easy homemade beignets can create a delightful dessert spread. A simple glass of cold milk or perhaps a sparkling strawberry orange refresher makes a lovely accompanying drink.
Your Strawberry Dream Layer Cake Questions Answered (FAQ)
Got questions about making this delightful cake? Here are some common ones:
Can I make the cake layers ahead of time?
Absolutely! You can bake the cake layers a day or two in advance. Once they are completely cool, wrap them tightly in plastic wrap and store them at room temperature. For longer storage, wrap them well and freeze for up to a month. Thaw them in the refrigerator before unwrapping and slicing.
Can I use frozen strawberries for the pink filling?
Yes, you can use frozen strawberries. Thaw them first and drain off any excess liquid before mashing and using them in the saucepan. The flavor might be slightly less vibrant than fresh, but they will still work well for the cooked filling.
How long will the Strawberry Dream Layer Cake last?
When stored properly in an airtight container in the refrigerator, this cake will remain fresh and delicious for 3-4 days. The chilling steps really help maintain the cake’s texture over time.
Can I use a different size pan?
This recipe is designed for two 8-inch round pans, which when sliced, create four layers for a tall cake. You could potentially use two 9-inch pans, but the layers will be thinner, and you might need to adjust the baking time slightly (likely less time). You may also only get three layers total. Using other pan sizes would require adjusting the recipe quantities significantly.
Why is the initial chilling after the crumb coat so important?
This chill is crucial for two main reasons directly related to preventing soggy layers. First, it firms up the strawberry filling, creating that essential moisture barrier between the juicy fruit/filling and the cake sponge. Second, it allows the cake structure to settle and firm up slightly after being layered with fillings, making the final frosting application much easier and cleaner.
Enjoy Your Homemade Strawberry Dream Layer Cake!
Baking this Strawberry Dream Layer Cake is such a rewarding experience, and the result is truly something special. The combination of tender cake, creamy filling, and fresh strawberries is simply irresistible, and knowing your layers will stay perfectly textured makes it even better. This cake is guaranteed to be a hit for any occasion, bringing smiles with every beautiful, non-soggy slice. Give it a try, and share your success!
Did you make this Strawberry Dream Layer Cake? I’d love to hear about it! Leave a comment below and let me know how it turned out. You can also rate the recipe!
Strawberry Dream Layer Cake

Ingredients
- For the cake:
- 2 cups all purpose flour
- 1 1/2 cups granulated sugar
- 3 1/2 teaspoons baking powder
- 1 teaspoon salt
- 1/2 cup unsalted butter softened
- 4 large eggs
- 1 cup milk
- 1 teaspoon vanilla extract
- For the pink strawberry layer:
- 1 cup mashed fresh strawberries
- 1/4 cup powdered sugar
- 1 tablespoon cornstarch
- 1/4 cup water
- 8 ounces cream cheese softened
- 1/2 cup powdered sugar
- 1 teaspoon vanilla extract
- 1 cup heavy cream whipped
- For the whipped cream frosting:
- 2 cups heavy cream
- 1/2 cup powdered sugar
- 1 teaspoon vanilla extract
- For the crumb coating:
- 1 1/2 cups crushed shortbread cookies or vanilla wafers
- Fresh strawberries for topping
Directions
- Preheat oven to 350 degrees F (175 degrees C). Grease and flour two 8-inch cake pans.
- Make the cake layers: In a large bowl, whisk together flour, granulated sugar, baking powder, and salt. Add softened butter and mix until crumbly. In a separate bowl, whisk together eggs, milk, and vanilla. Gradually add wet ingredients to dry ingredients, mixing until just combined. Pour batter evenly into prepared pans. Bake for 25-30 minutes, or until a wooden skewer inserted into the center comes out clean. Let cool in pans for 10 minutes, then invert onto a wire rack to cool completely. Once cool, use a serrated knife to level the tops if needed. Cut each cake layer in half horizontally to make four thin layers total.
- Make the pink strawberry layer: In a small saucepan, combine mashed strawberries, 1/4 cup powdered sugar, cornstarch, and water. Cook over medium heat, stirring constantly, until thickened, about 5-7 minutes. Remove from heat and let cool completely. In a bowl, beat softened cream cheese with 1/2 cup powdered sugar and vanilla extract until smooth. Gently fold the cooled strawberry mixture into the cream cheese mixture. Fold in the whipped heavy cream.
- Make the whipped cream frosting: In a cold bowl, beat heavy cream with powdered sugar and vanilla until stiff peaks form.
- Assemble the cake, preventing sogginess: Place the first cake layer on your serving plate. Spread half of the pink strawberry filling evenly over this layer. This stable layer is key to protecting the sponge from moisture. Arrange a single layer of sliced fresh strawberries over the pink filling, if desired. Place the second cake layer gently on top. Spread the remaining pink strawberry filling over the second layer. Add more sliced strawberries. Place the third cake layer on top. Spread half of the whipped cream frosting over this layer. Add sliced strawberries. Place the final cake layer on top.
- Chill to set and lock in texture: This is the crucial step to avoid sogginess. Apply a thin crumb coat of whipped cream all over the cake. Chill the cake in the refrigerator for at least 2 hours. This allows the layers to settle and the pink filling to firm up, creating a barrier that keeps the cake layers light and prevents them from absorbing too much moisture from the fillings and fruit.
- Decorate: Apply the remaining whipped cream frosting smoothly over the chilled cake. Gently press the crushed cookies or wafers onto the sides and around the top edge of the cake. Decorate the top with swirls of whipped cream and fresh strawberry slices.
- Final Chill: For best results and absolutely no sogginess, chill the finished cake for at least another 2 hours, or preferably overnight, before slicing and serving. This final chill ensures everything is set perfectly.